Lexus LS 500 F-Sport Retrofit Kit
Welcome to my first post in my “Projects” blog!
I’ve been a bit busy with different tasks but this was a project I knew I wanted to take a few pictures of because my client’s car is a beauty!
Basically this project will allow my client to use Android Auto and Apple Car Play by integrating a “Retrofit Kit” between his factory system and screen.
If you are curious as to why I am installing a kit “between” his factory setup, it’s because Lexus (among many other luxury cars) have dashboards/systems that are proprietary in design and we can’t simply purchase an aftermarket system to install.
So… as a way to get around this, I’m harnessing a kit that will intercept signals from his factory system and decode/display both his stock system and the new system!
Exciting yes?! lol
Let’s start with the car shall we?

Lexus LS 500 F-Sport V6 Twin Turbo!

Here’s a simple view of the front interior with it’s red leather!
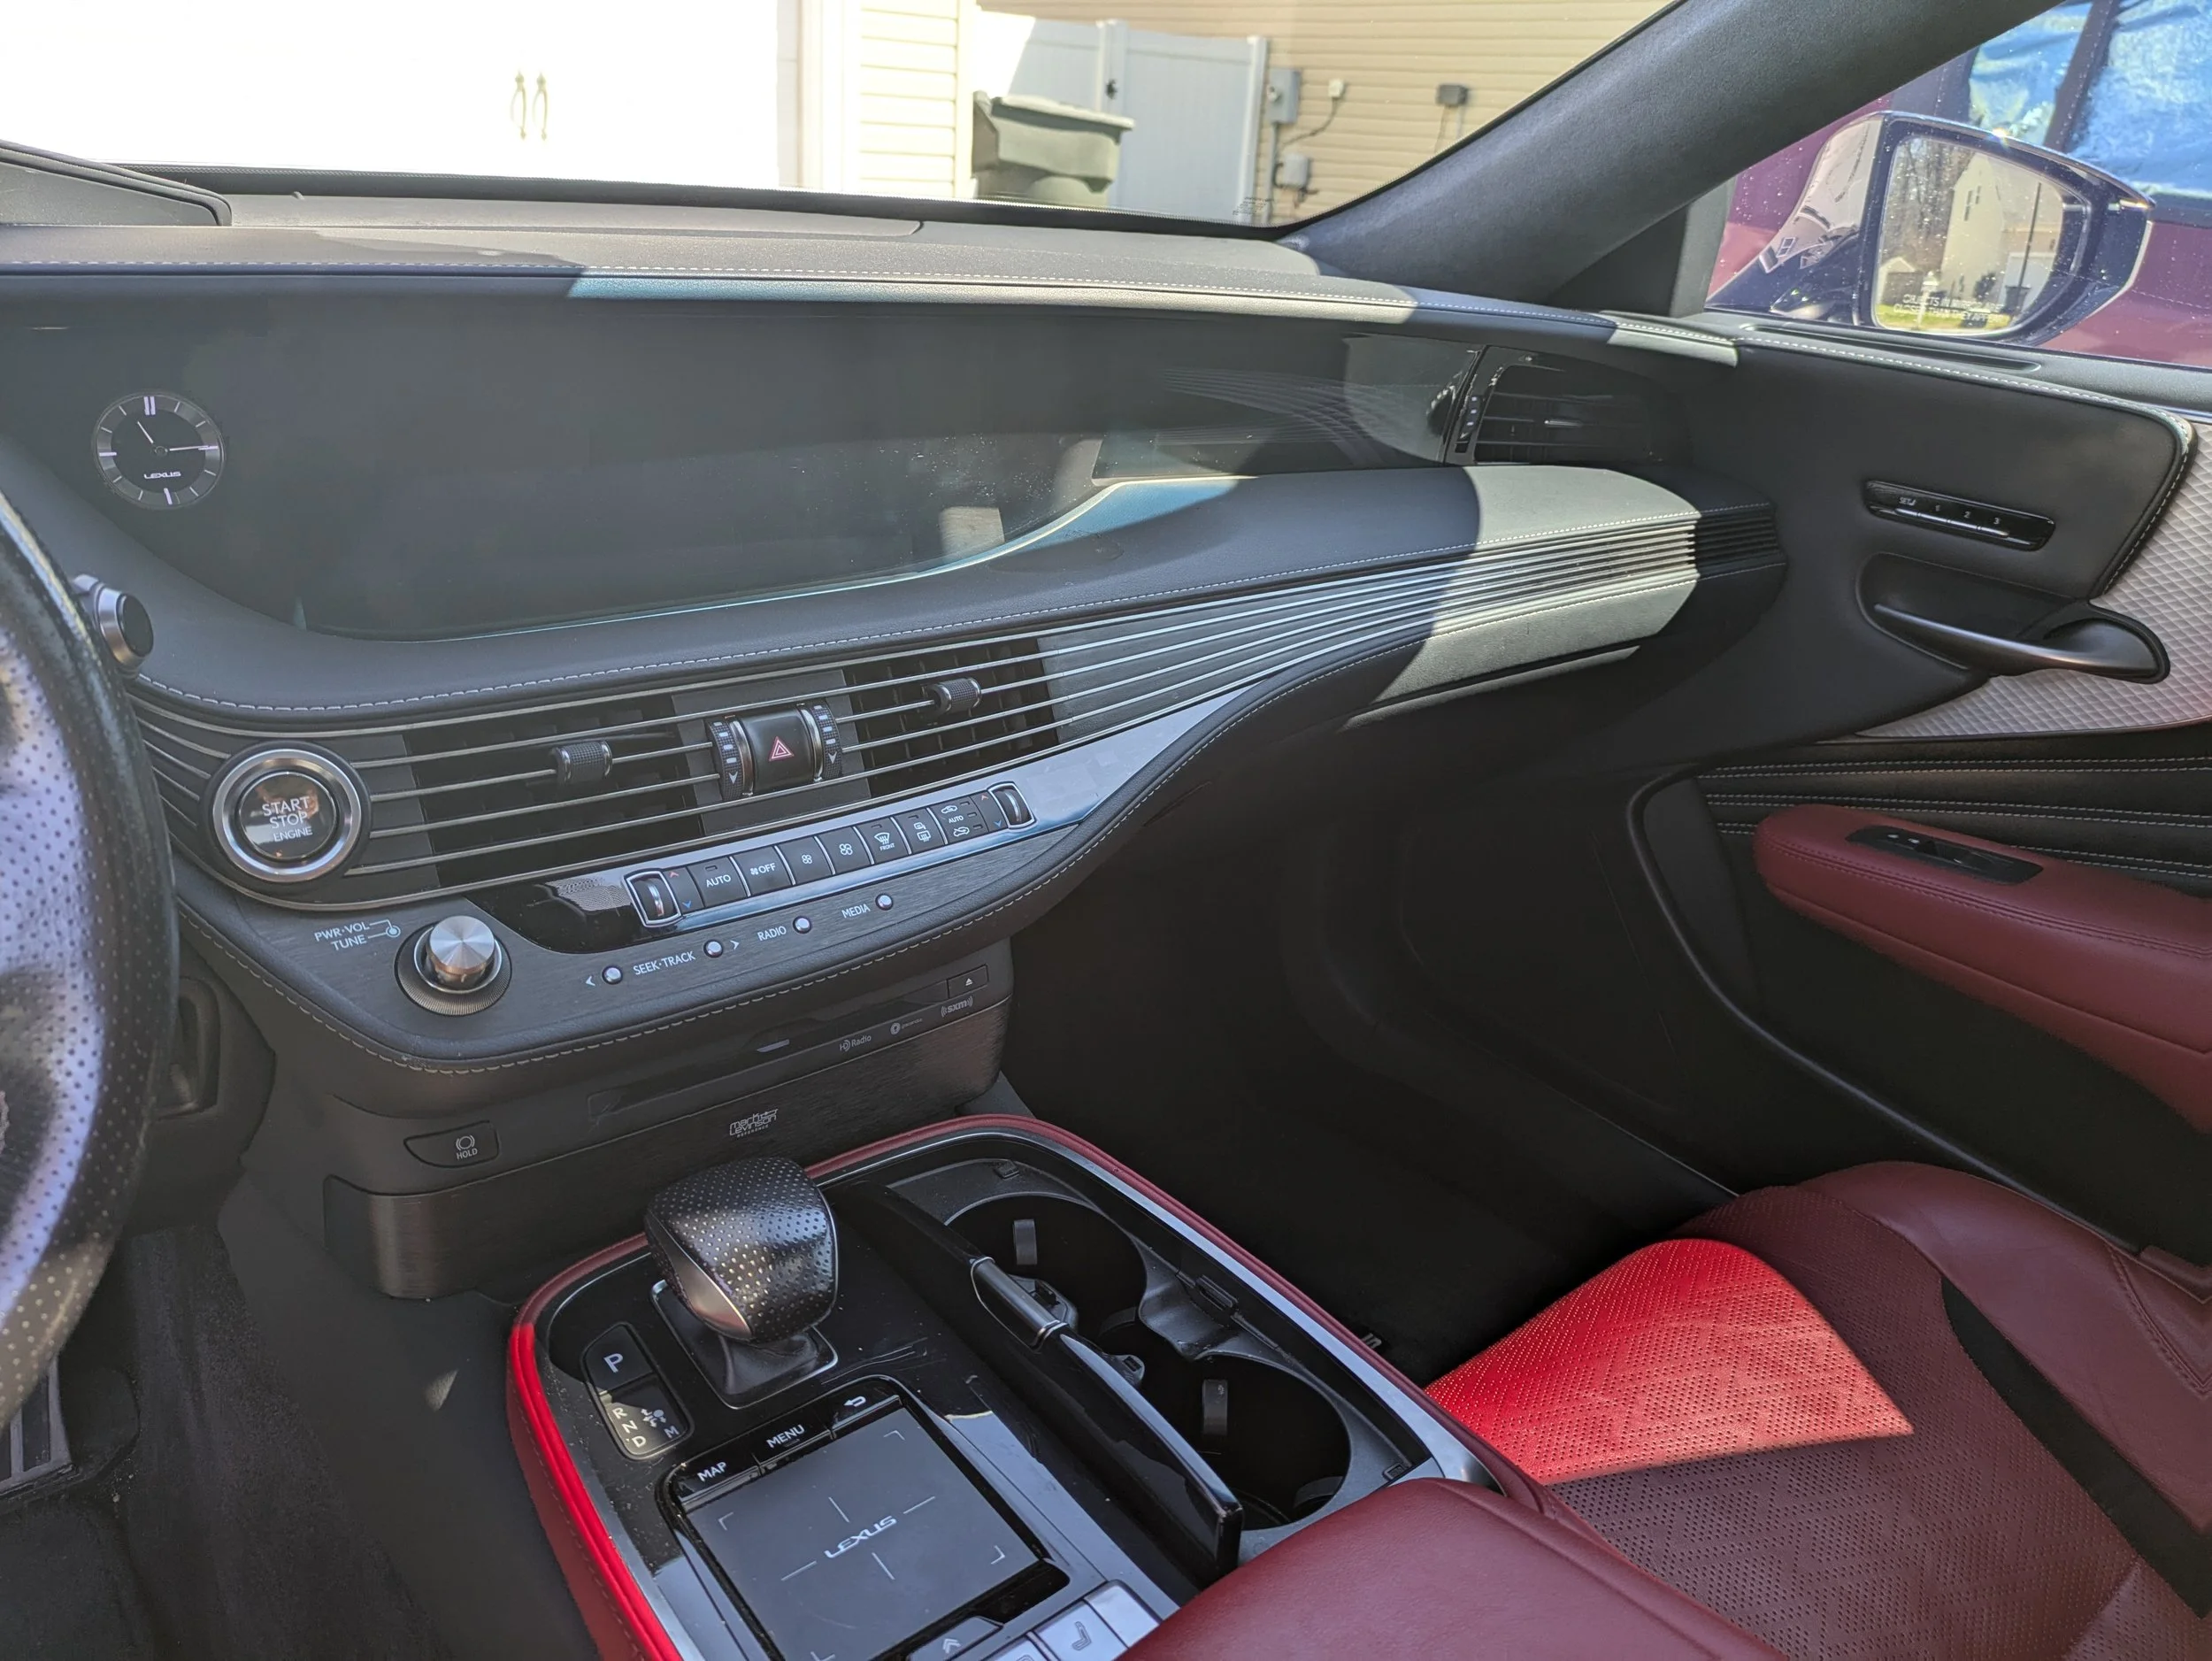
Here is where I’ll be spending most of my time working!
And let’s begin!

These are my suggested tools for said project!
You may think I’m being funny but I’m being both funny and serious!
The bible (along with prayer) is the first thing I need before I start this project because God is the one who first and foremost gave me the hands and the mind to be able to figure this project out.
I reference two passages for this project….
The first is one of my life verses:
“ Each of you should use whatever gift you have received to serve others, as faithful stewards of God’s grace in its various forms.” -1 Peter 4:10
The second speaks of the same topic:
“For just as each of us has one body with many members, and these members do not all have the same function, so in Christ we, though many, form one body, and each member belongs to all the others. We have different gifts, according to the grace given to each of us. If your gift is prophesying, then prophesy in accordance with your faith; if it is serving, then serve; if it is teaching, then teach; if it is to encourage, then give encouragement; if it is giving, then give generously; if it is to lead, do it diligently; if it is to show mercy, do it cheerfully.” - Romans 12:4-8
I’m in a season of my life where I am trying to figure out really who I am and what purpose God has called me to be here on earth. I have a lot of things to figure out and I know I always will until God calls me home, but one thing I am 100% sure of… God has given me a gift to work with my hands and I want to use it to serve others!
So in all seriousness, though I am being a “little” funny about my Bible being a part of my toolbox because this project can (and did) test my patience and anxieties, I’m being serious when I say we all need to become more aware of what gift God has given us and how to serve one another!
Now that I have spoken truth! =D
The rest of the tools are pretty straight forward…..
Starting to the right of my bible…
1) Endoscope (To see in tight places)
2) A set of Trim/Panel removal tools (Preferably Craftsman)
2) A socket and ratchet set (Preferably Craftsman)
3) A Philips/Flat head (Preferably Craftsman) **Actually didn’t need these **
4) Gloves
5) Bluetooth Speaker for music
6) Water (stay hydrated!)
7) A camera to document (Preferable Sony)
8) Your actual hardware to install!
*If you didn’t notice by now… I have a bit of preference towards Craftsman and I love Sony! I used to work for Sears many years ago, before they went under, and I have always been a Sony Fan… Take that all you Apple FanBoys and FanGirls! LOL*
Moving on!

First things first! Disconnect that Negative terminal first, followed by the positive terminal. This requires a 10mm socket (again Craftsman…) and just so you know… this car’s engine is stupid big and they use every inch of that engine bay! The battery is in the trunk if you didn’t gather that from the picture haha

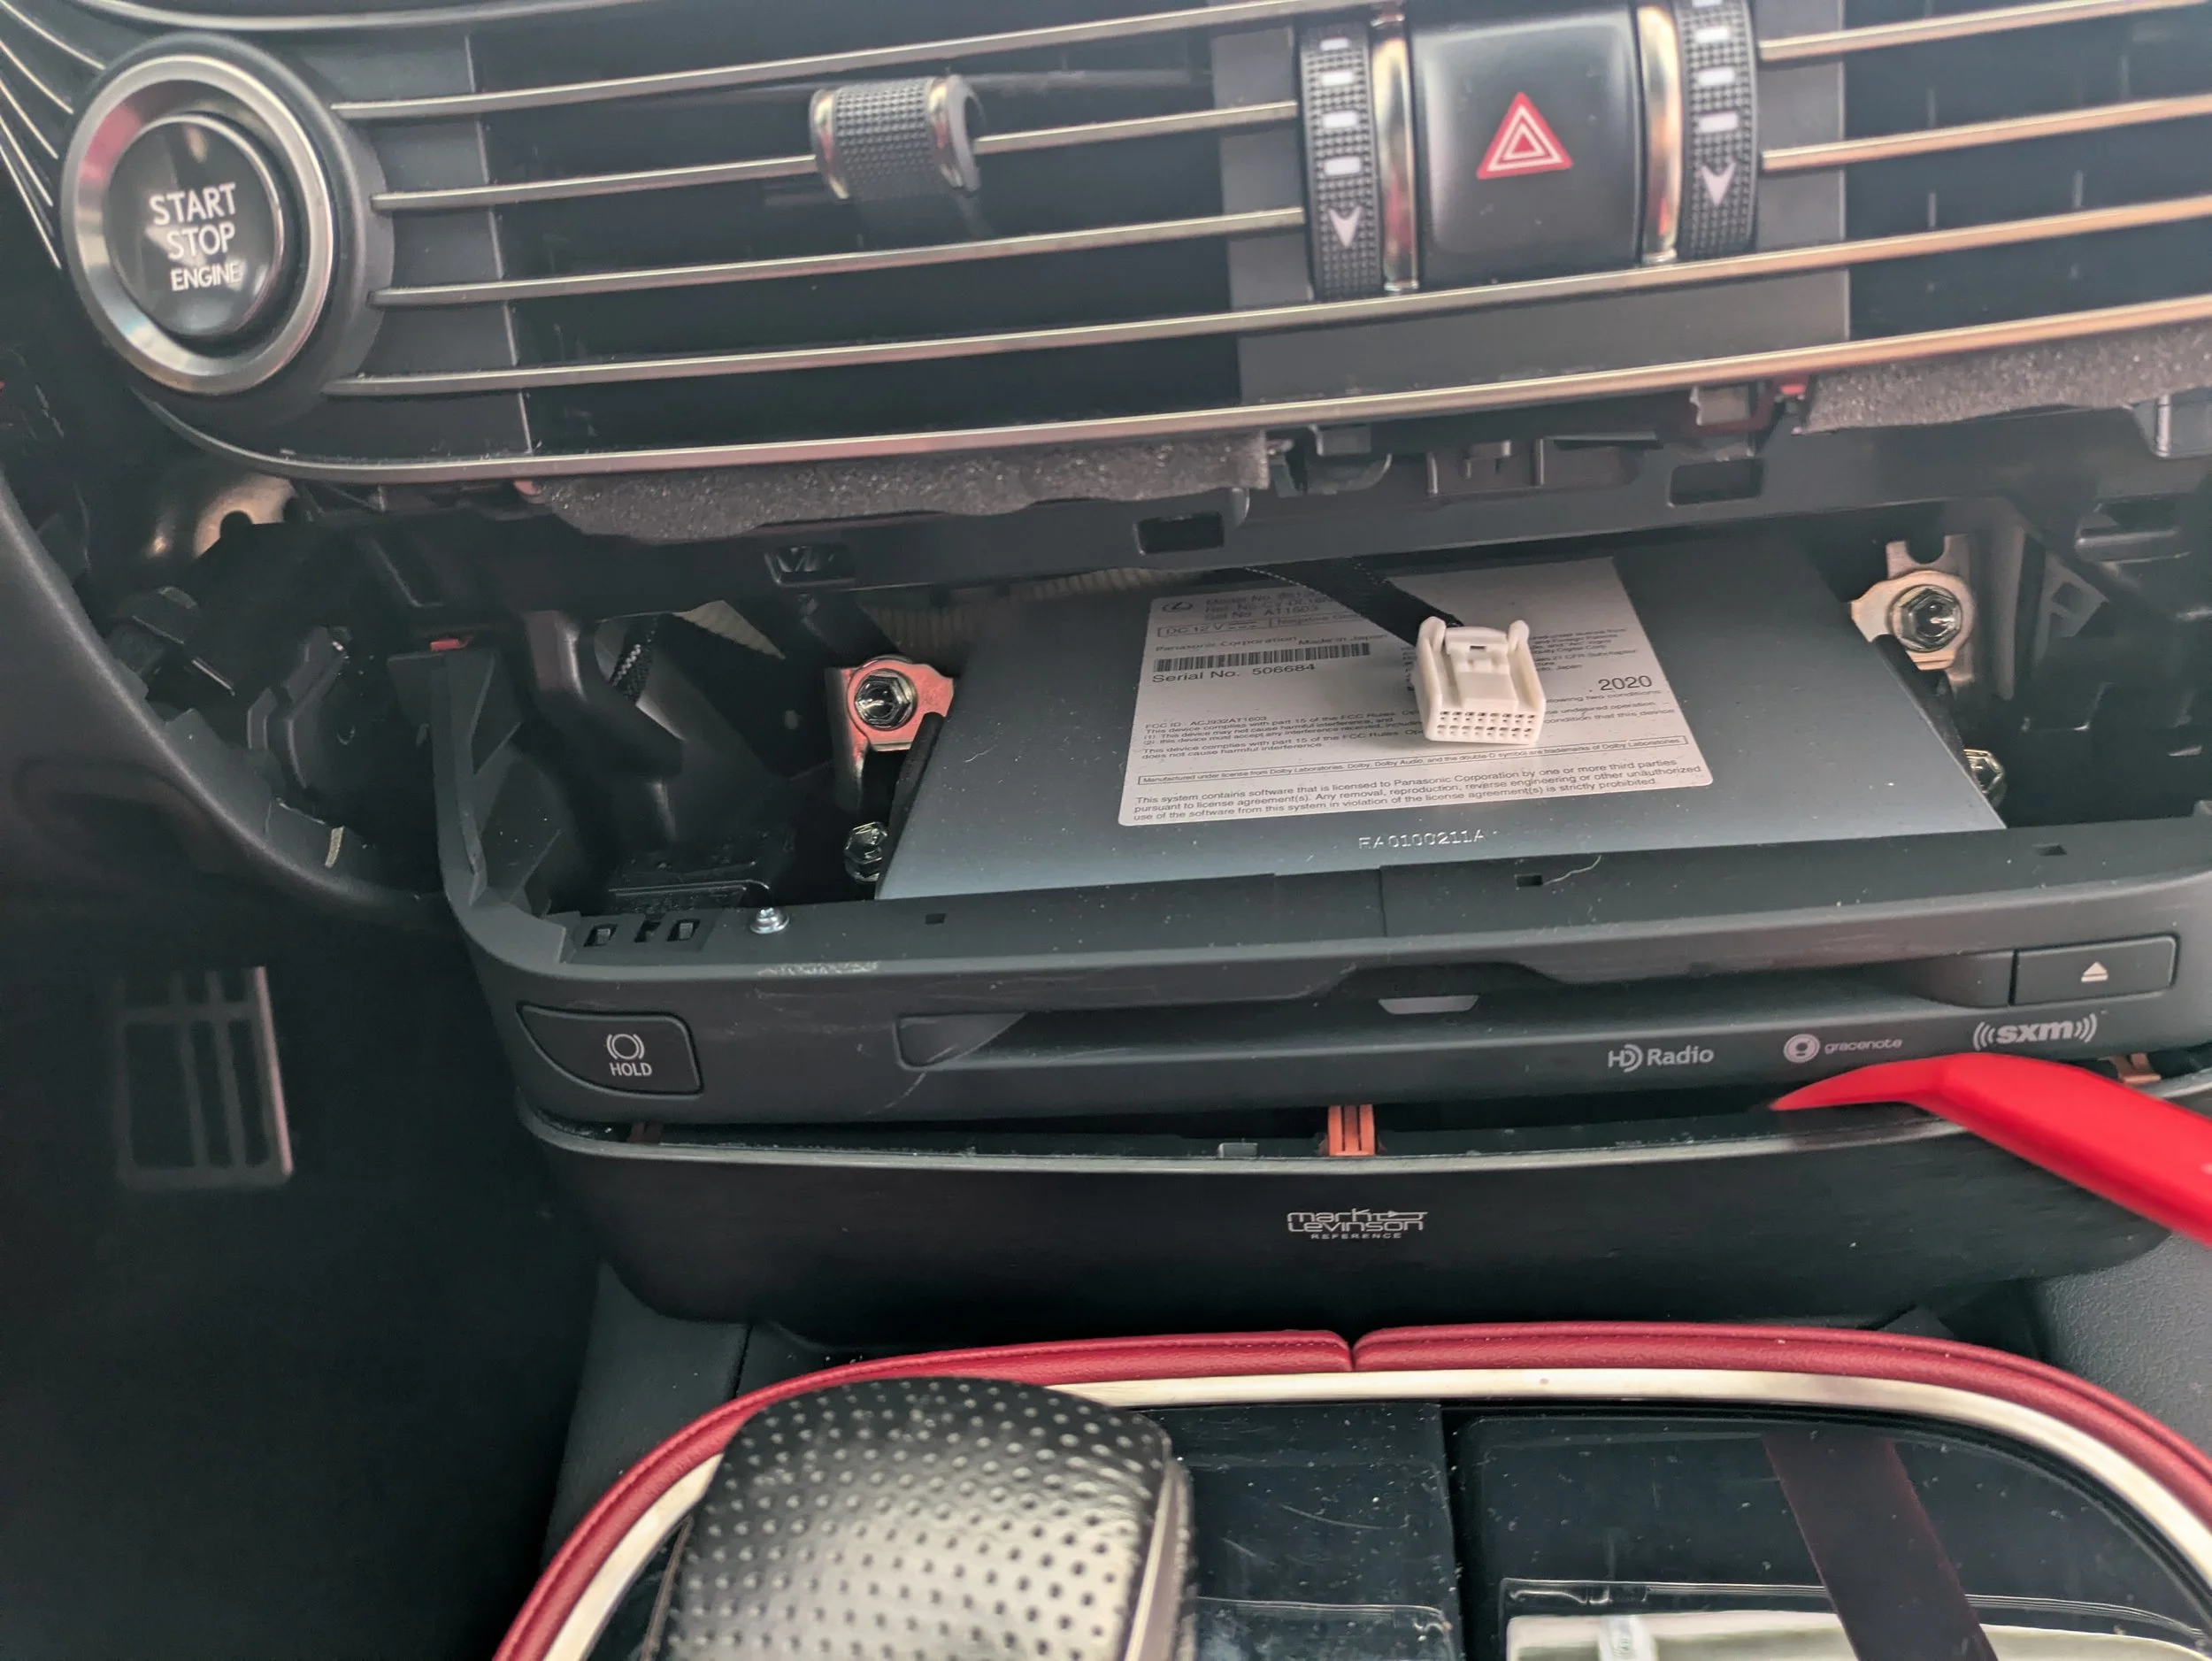
Now….Essentially I have to remove the system that is located where the Disk Drive is located just in front of the shifter knob. In order to do this, the dash above it has to be removed. We do that by starting along the passenger side!
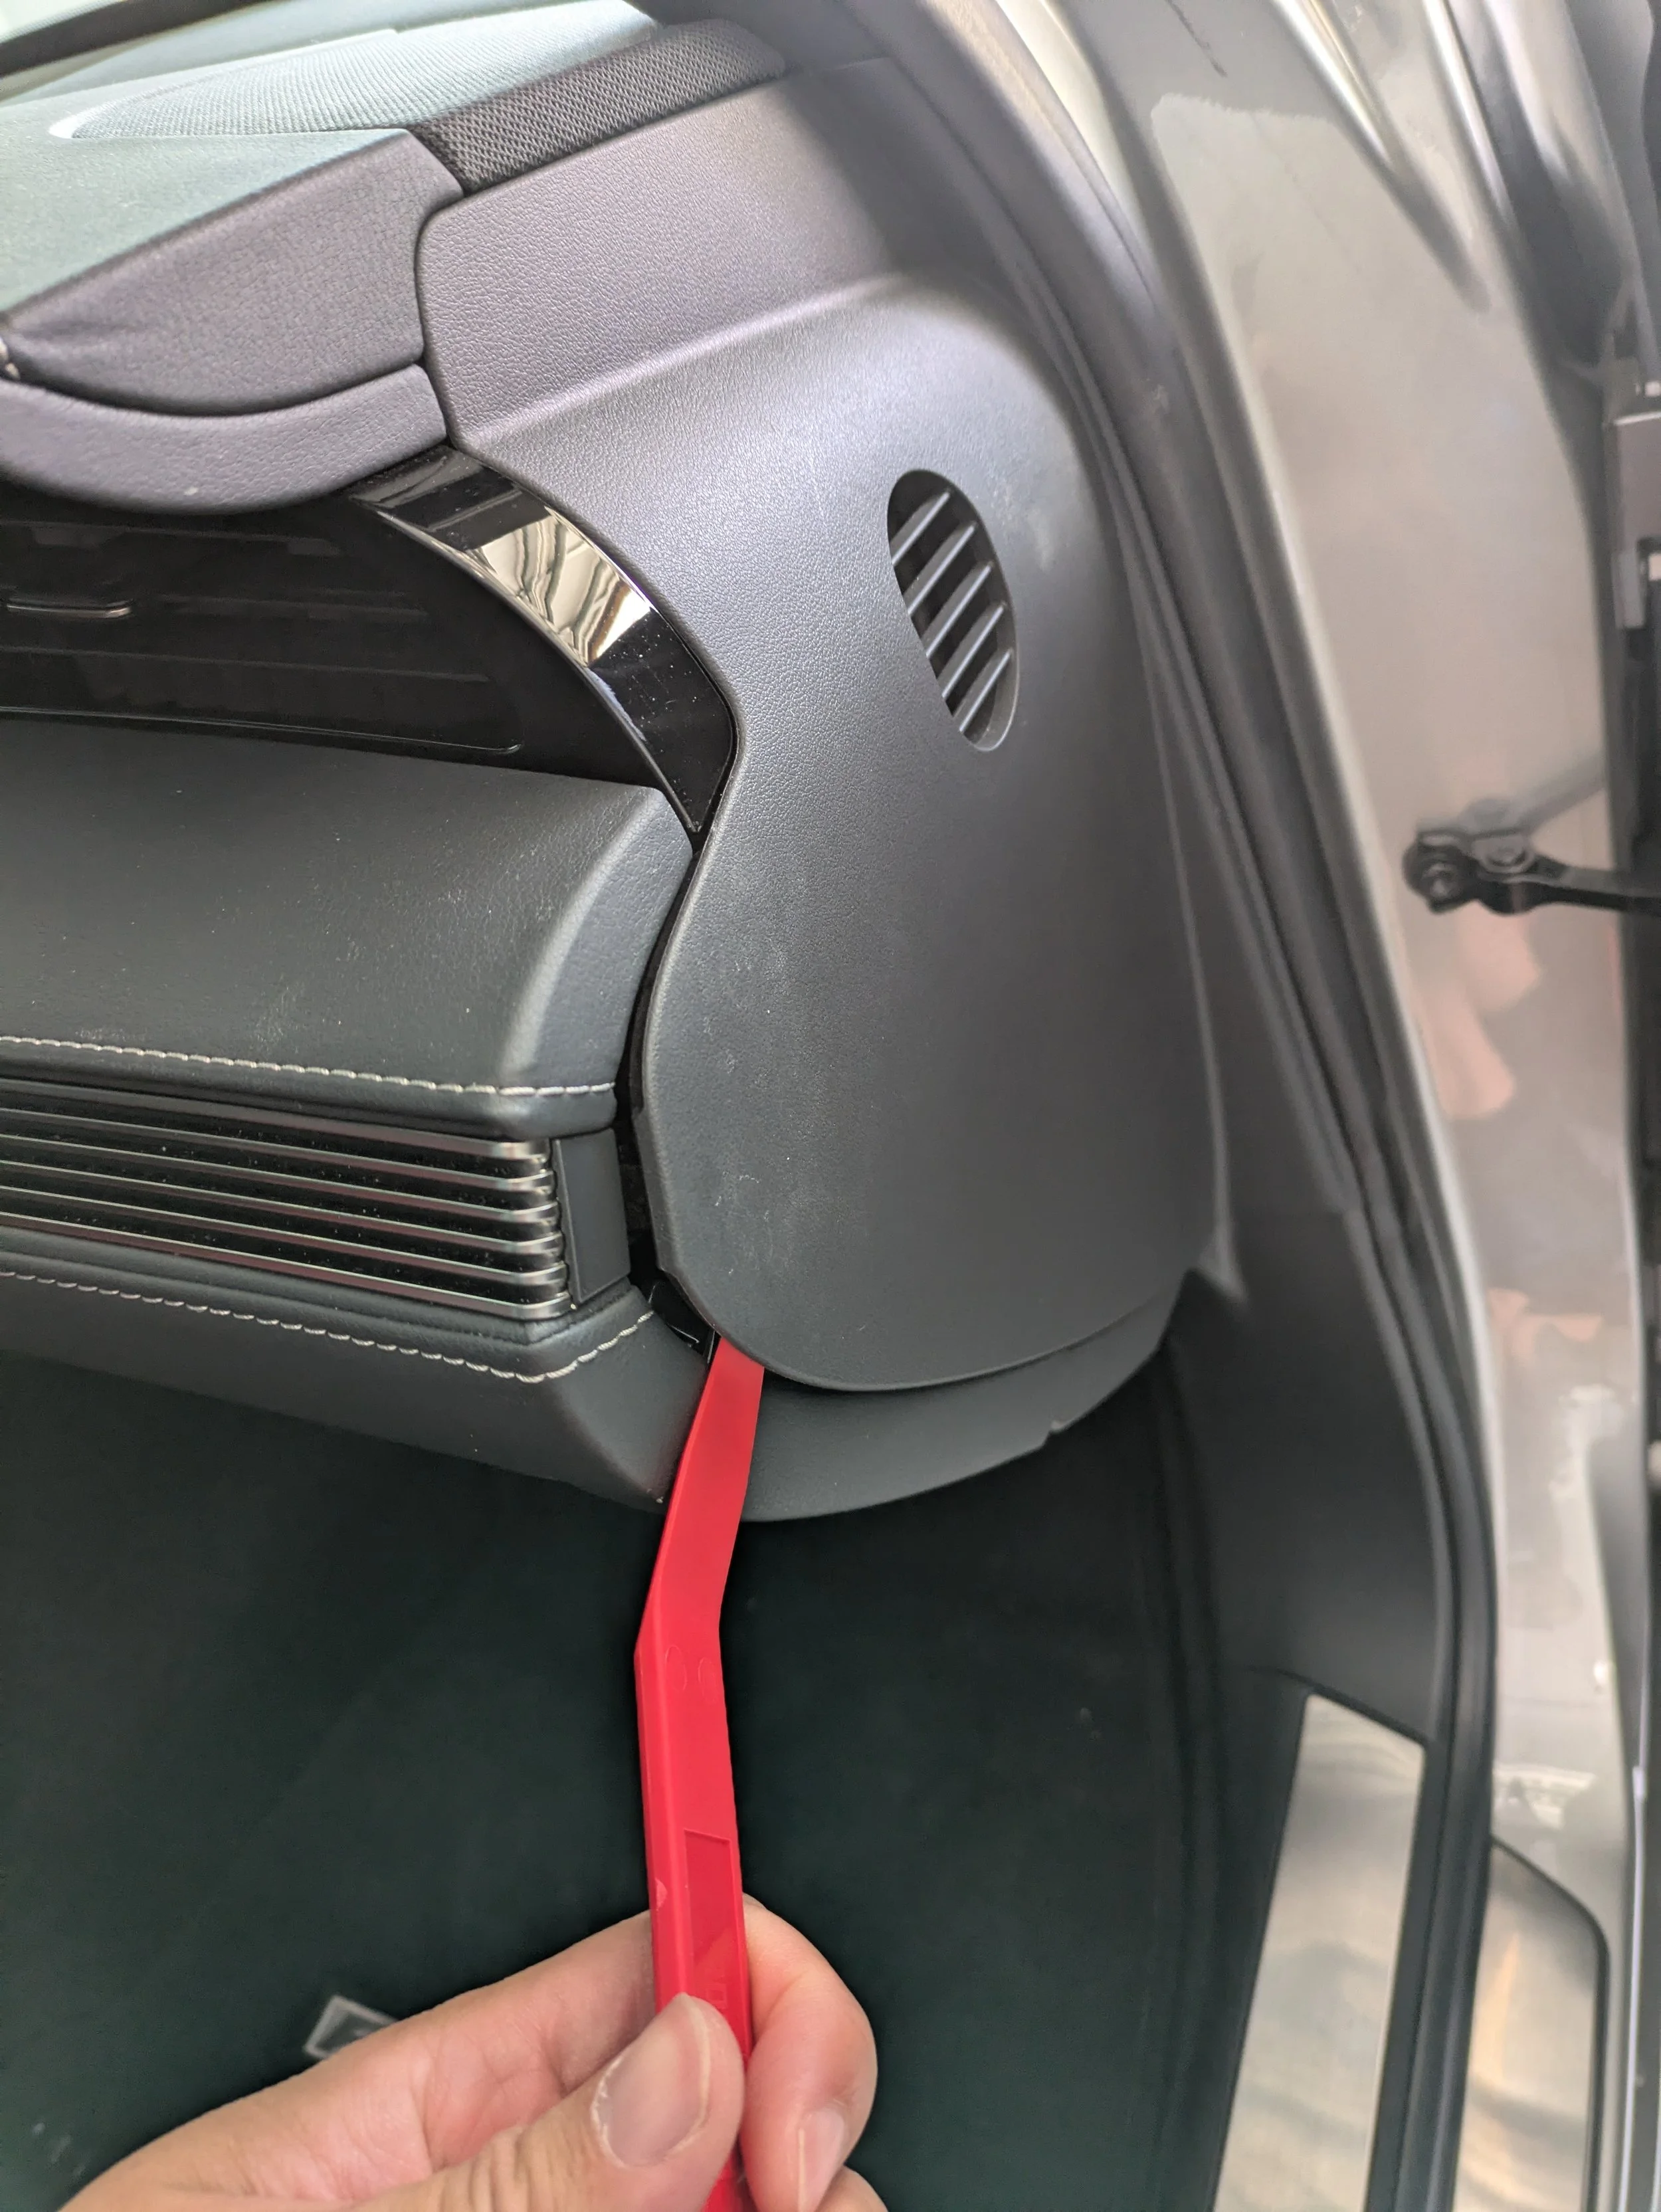
Basically you find a decent spot to get in with your pry tool and work your way around!

Then you are going to start working the front dash which is 3 separate parts. The bottom trim is for the AC control. The middle is for the vents and the top is the dash panel for the base of the screen.
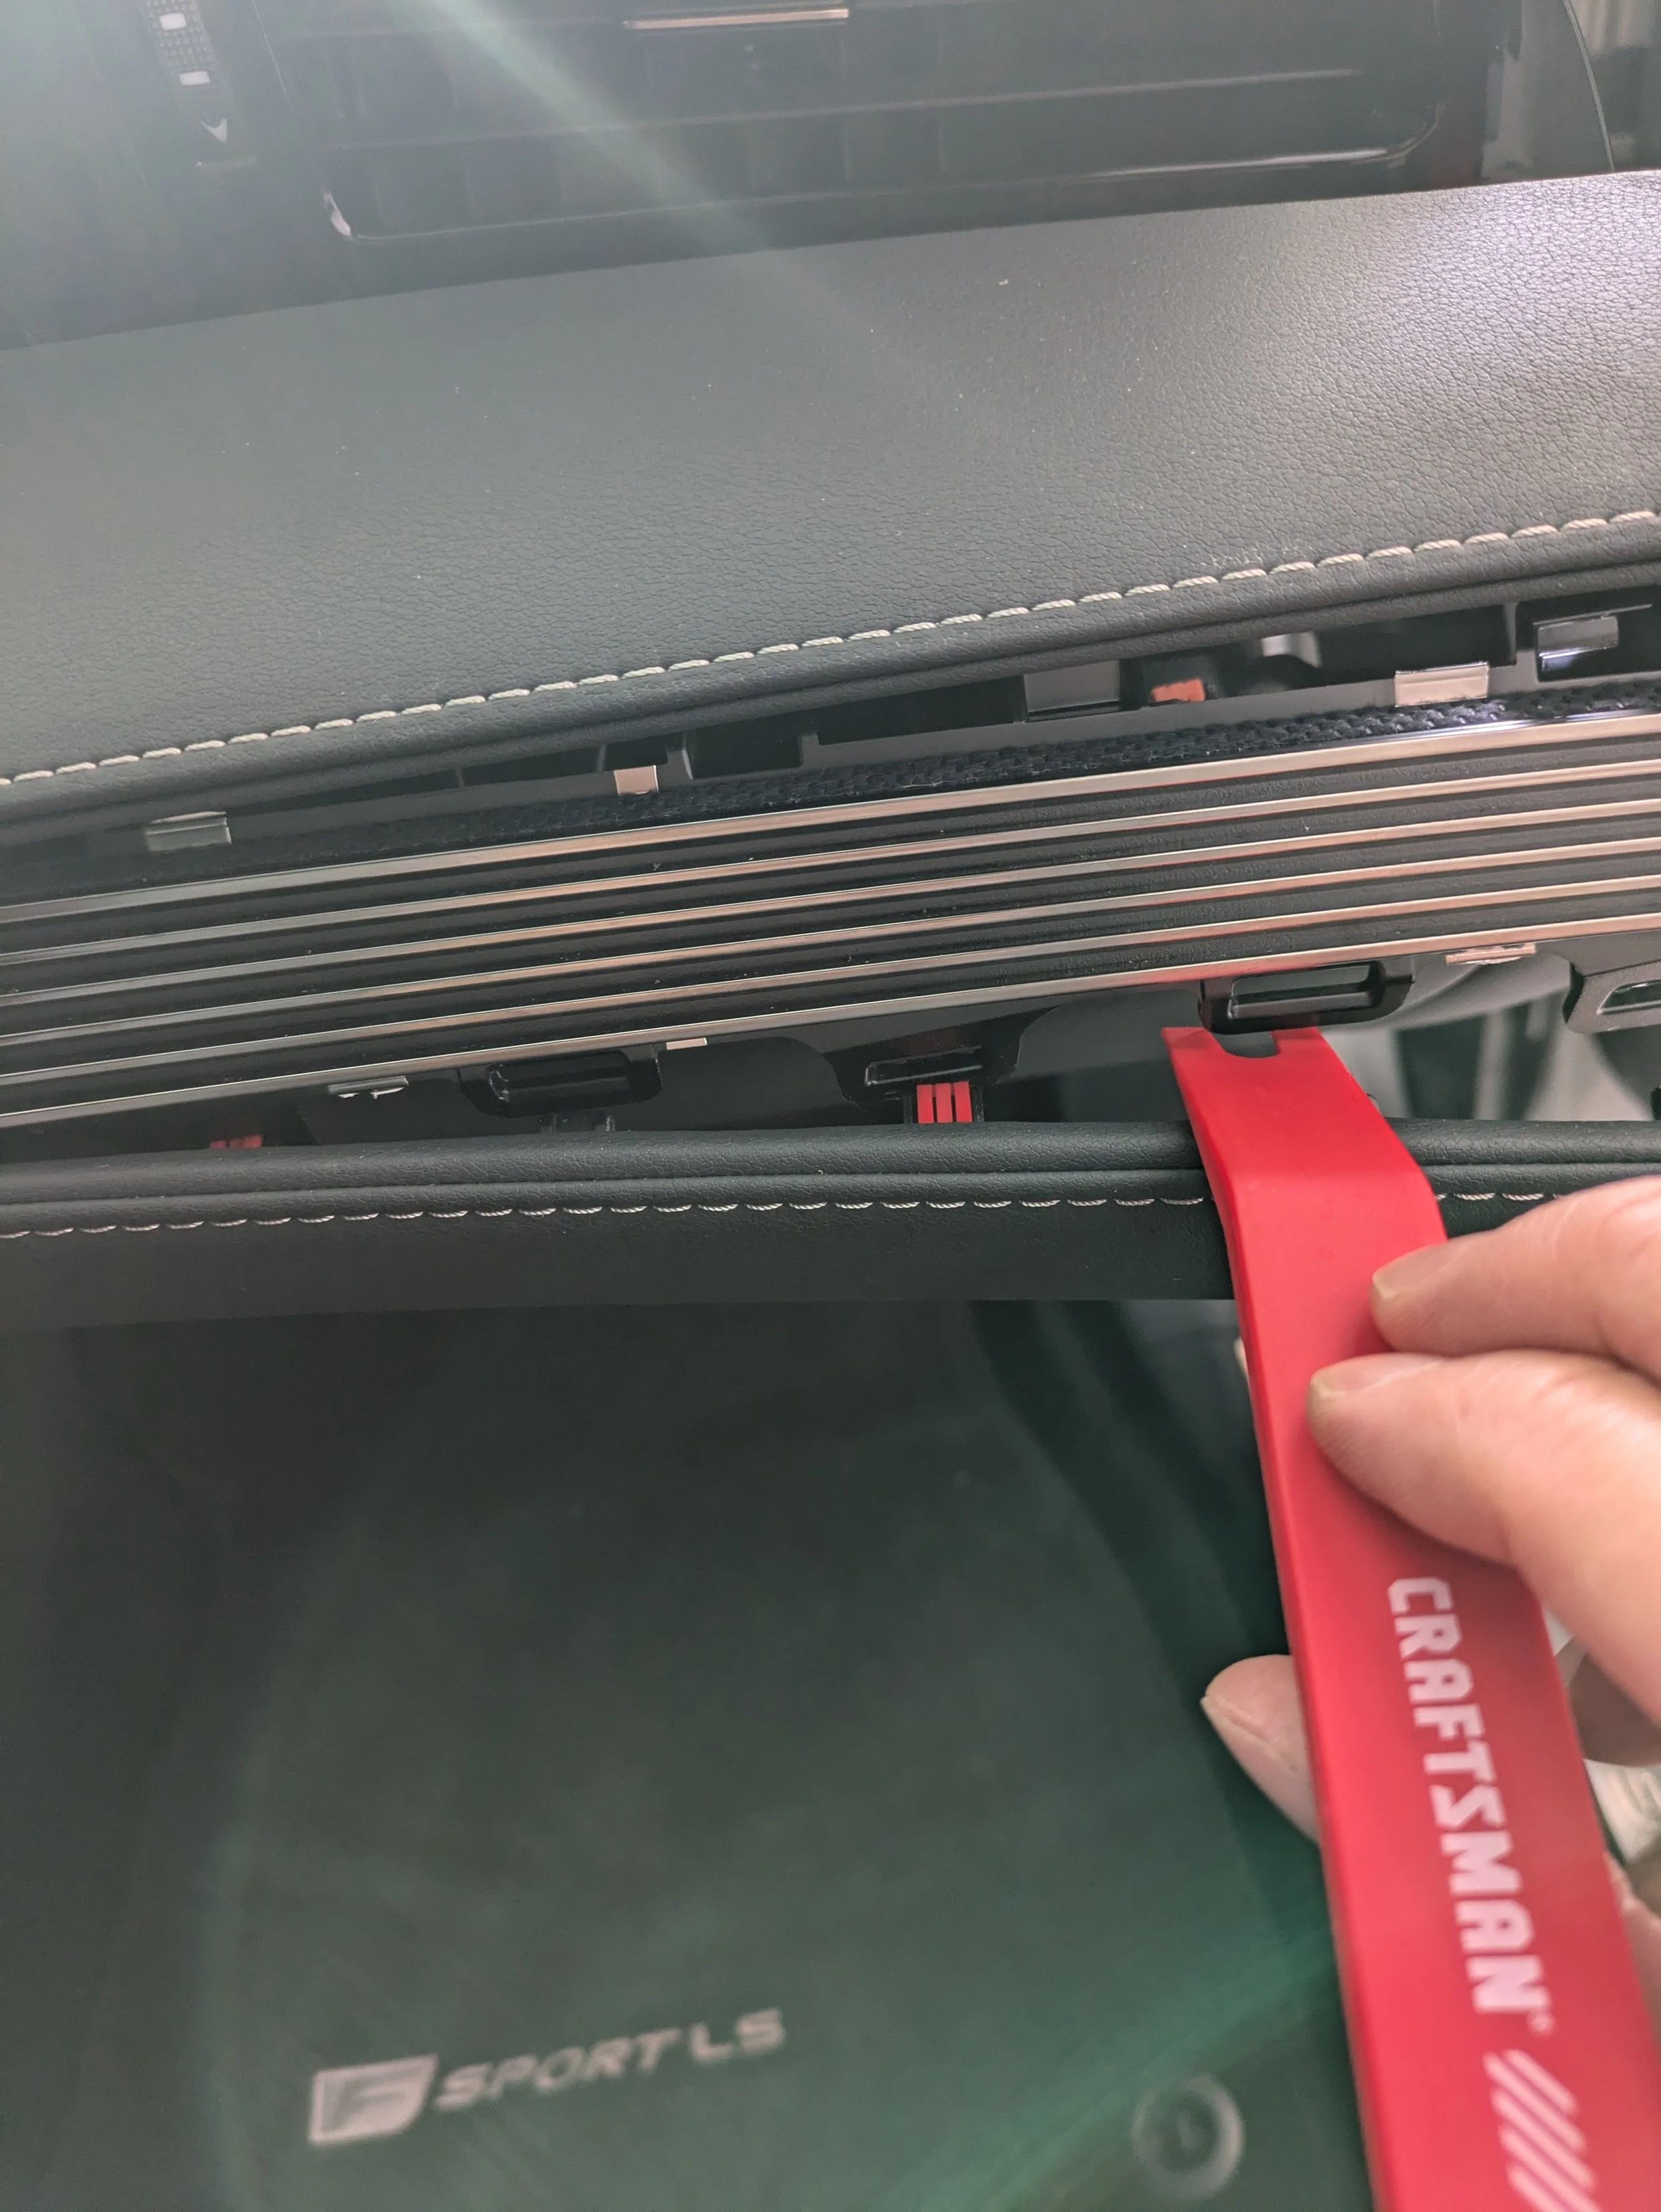
basically I worked my way down from the far passenger side to the center of the dash. Remember… Craftsman if you want the job done well! LOL

Now in the beginning I “thought” I was going to be able to avoid taking this entire dash board apart so I just removed the bottom section (I will be rudely corrected later in this project and have to remove everything lol)
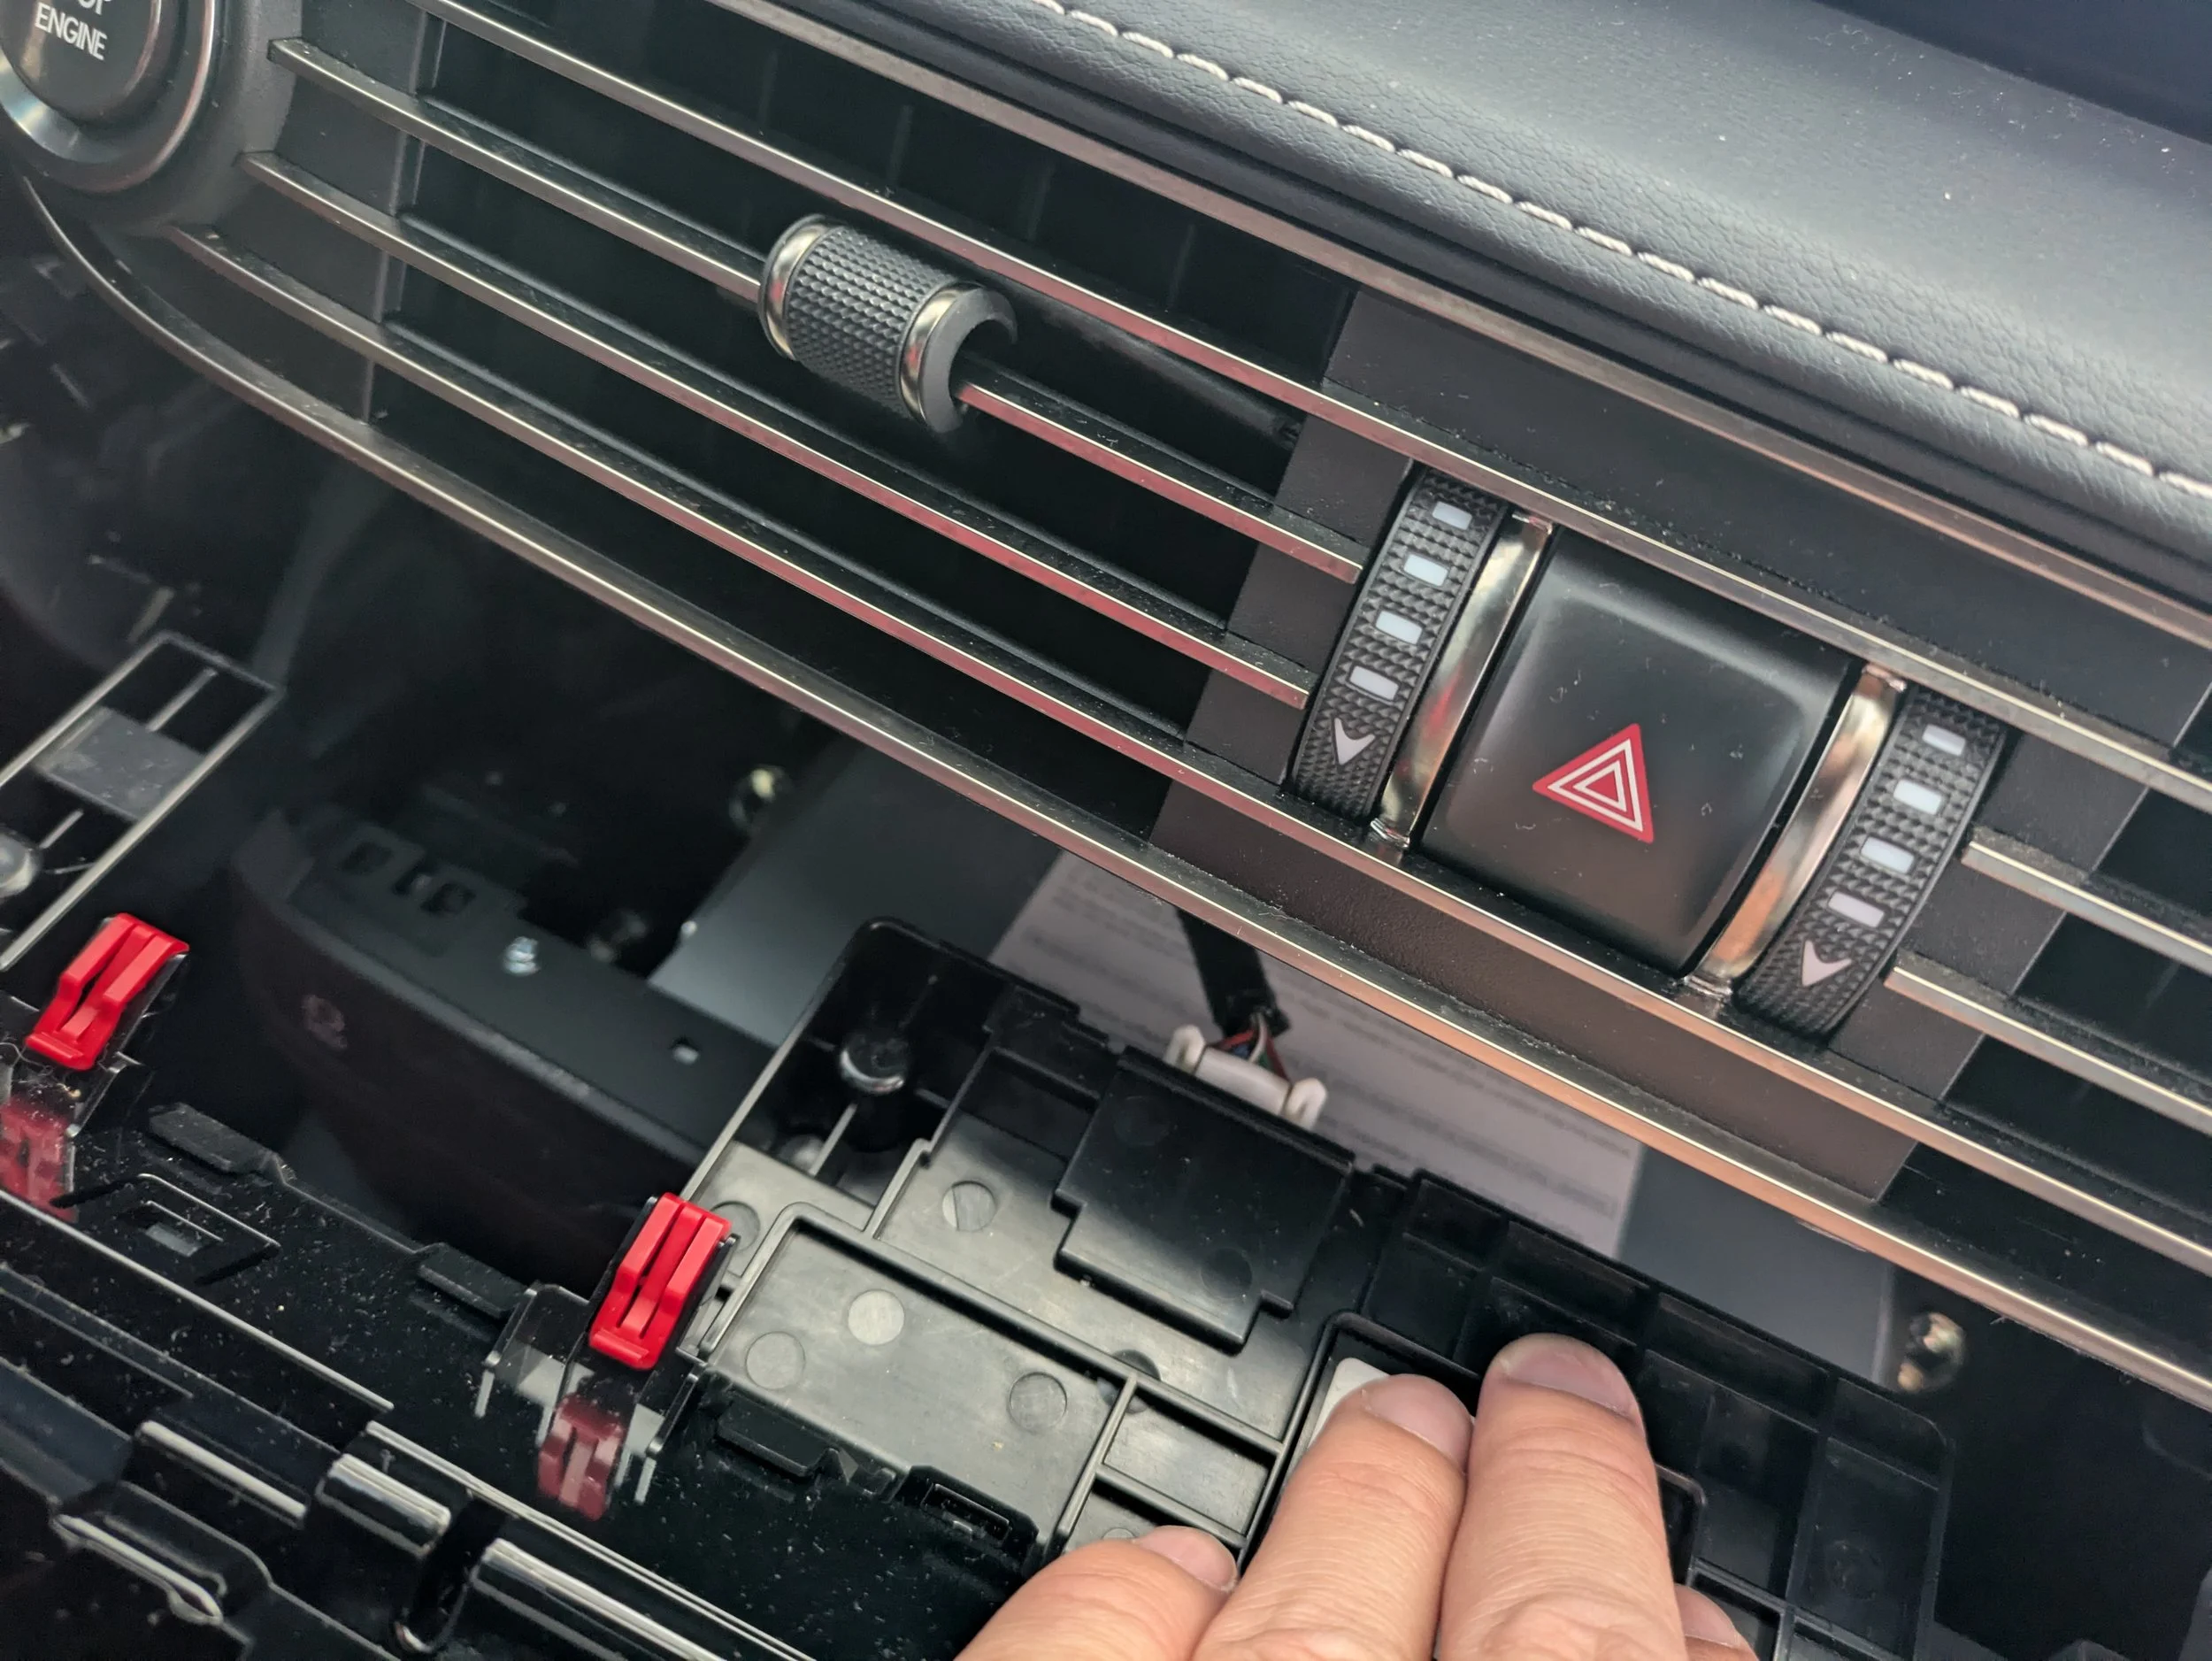
The AC panel is connected with just one cable (thank you God!)

Next remove this vanity cover over the base of the disk drive to reveal a bolt on each side that needs to be removed. Same process… find a good place to get your pry tool in and work around.
I worked the right side, then left side and then pulled from the center and it came off like frozen butter… LoL
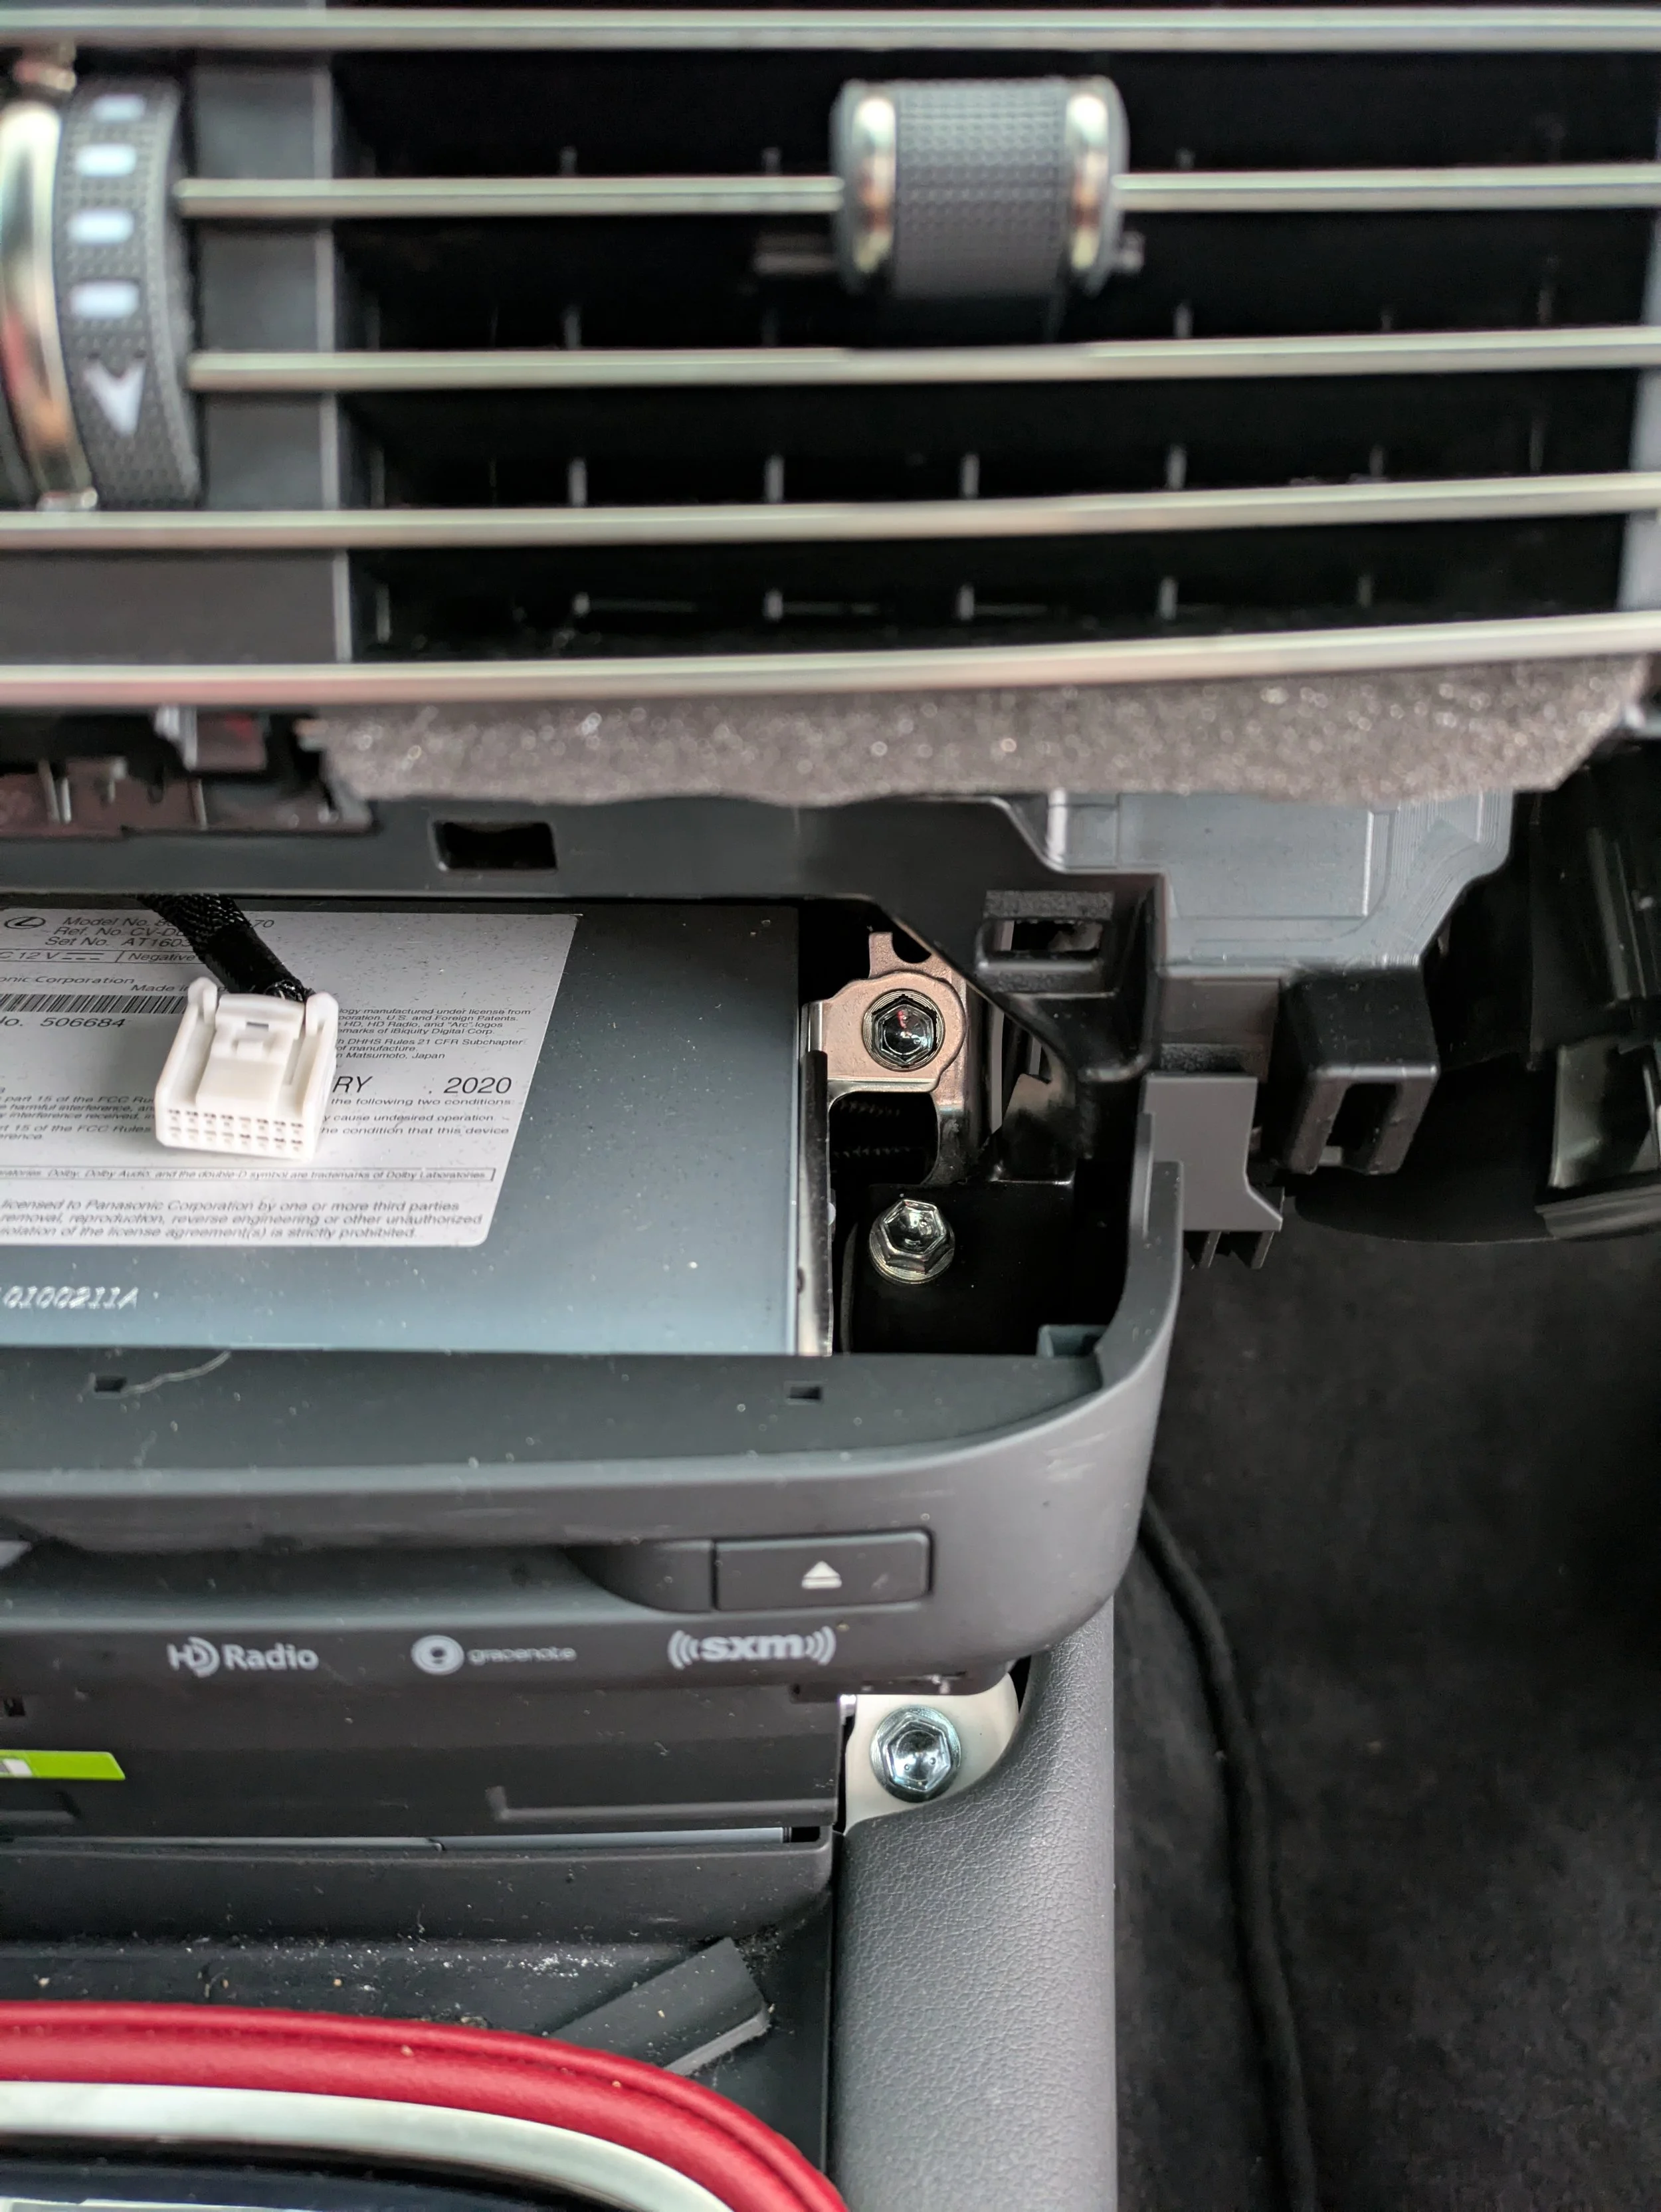
You will need to remove the very top bolt and it’s “mirrored” twin on left side of the system. (10 mm socket… craftsman….)

Then you’ll need to remove this top bolt from the right side of the system and it’s “mirrored” twin on the left side of the system. (8mm socket… you should have bought a craftsman set by now if you haven’t already!)
The part where you remove the system itself… is annoying as mess….
I would highly suggest remove the shifter and it’s surrounding console to make life easier….
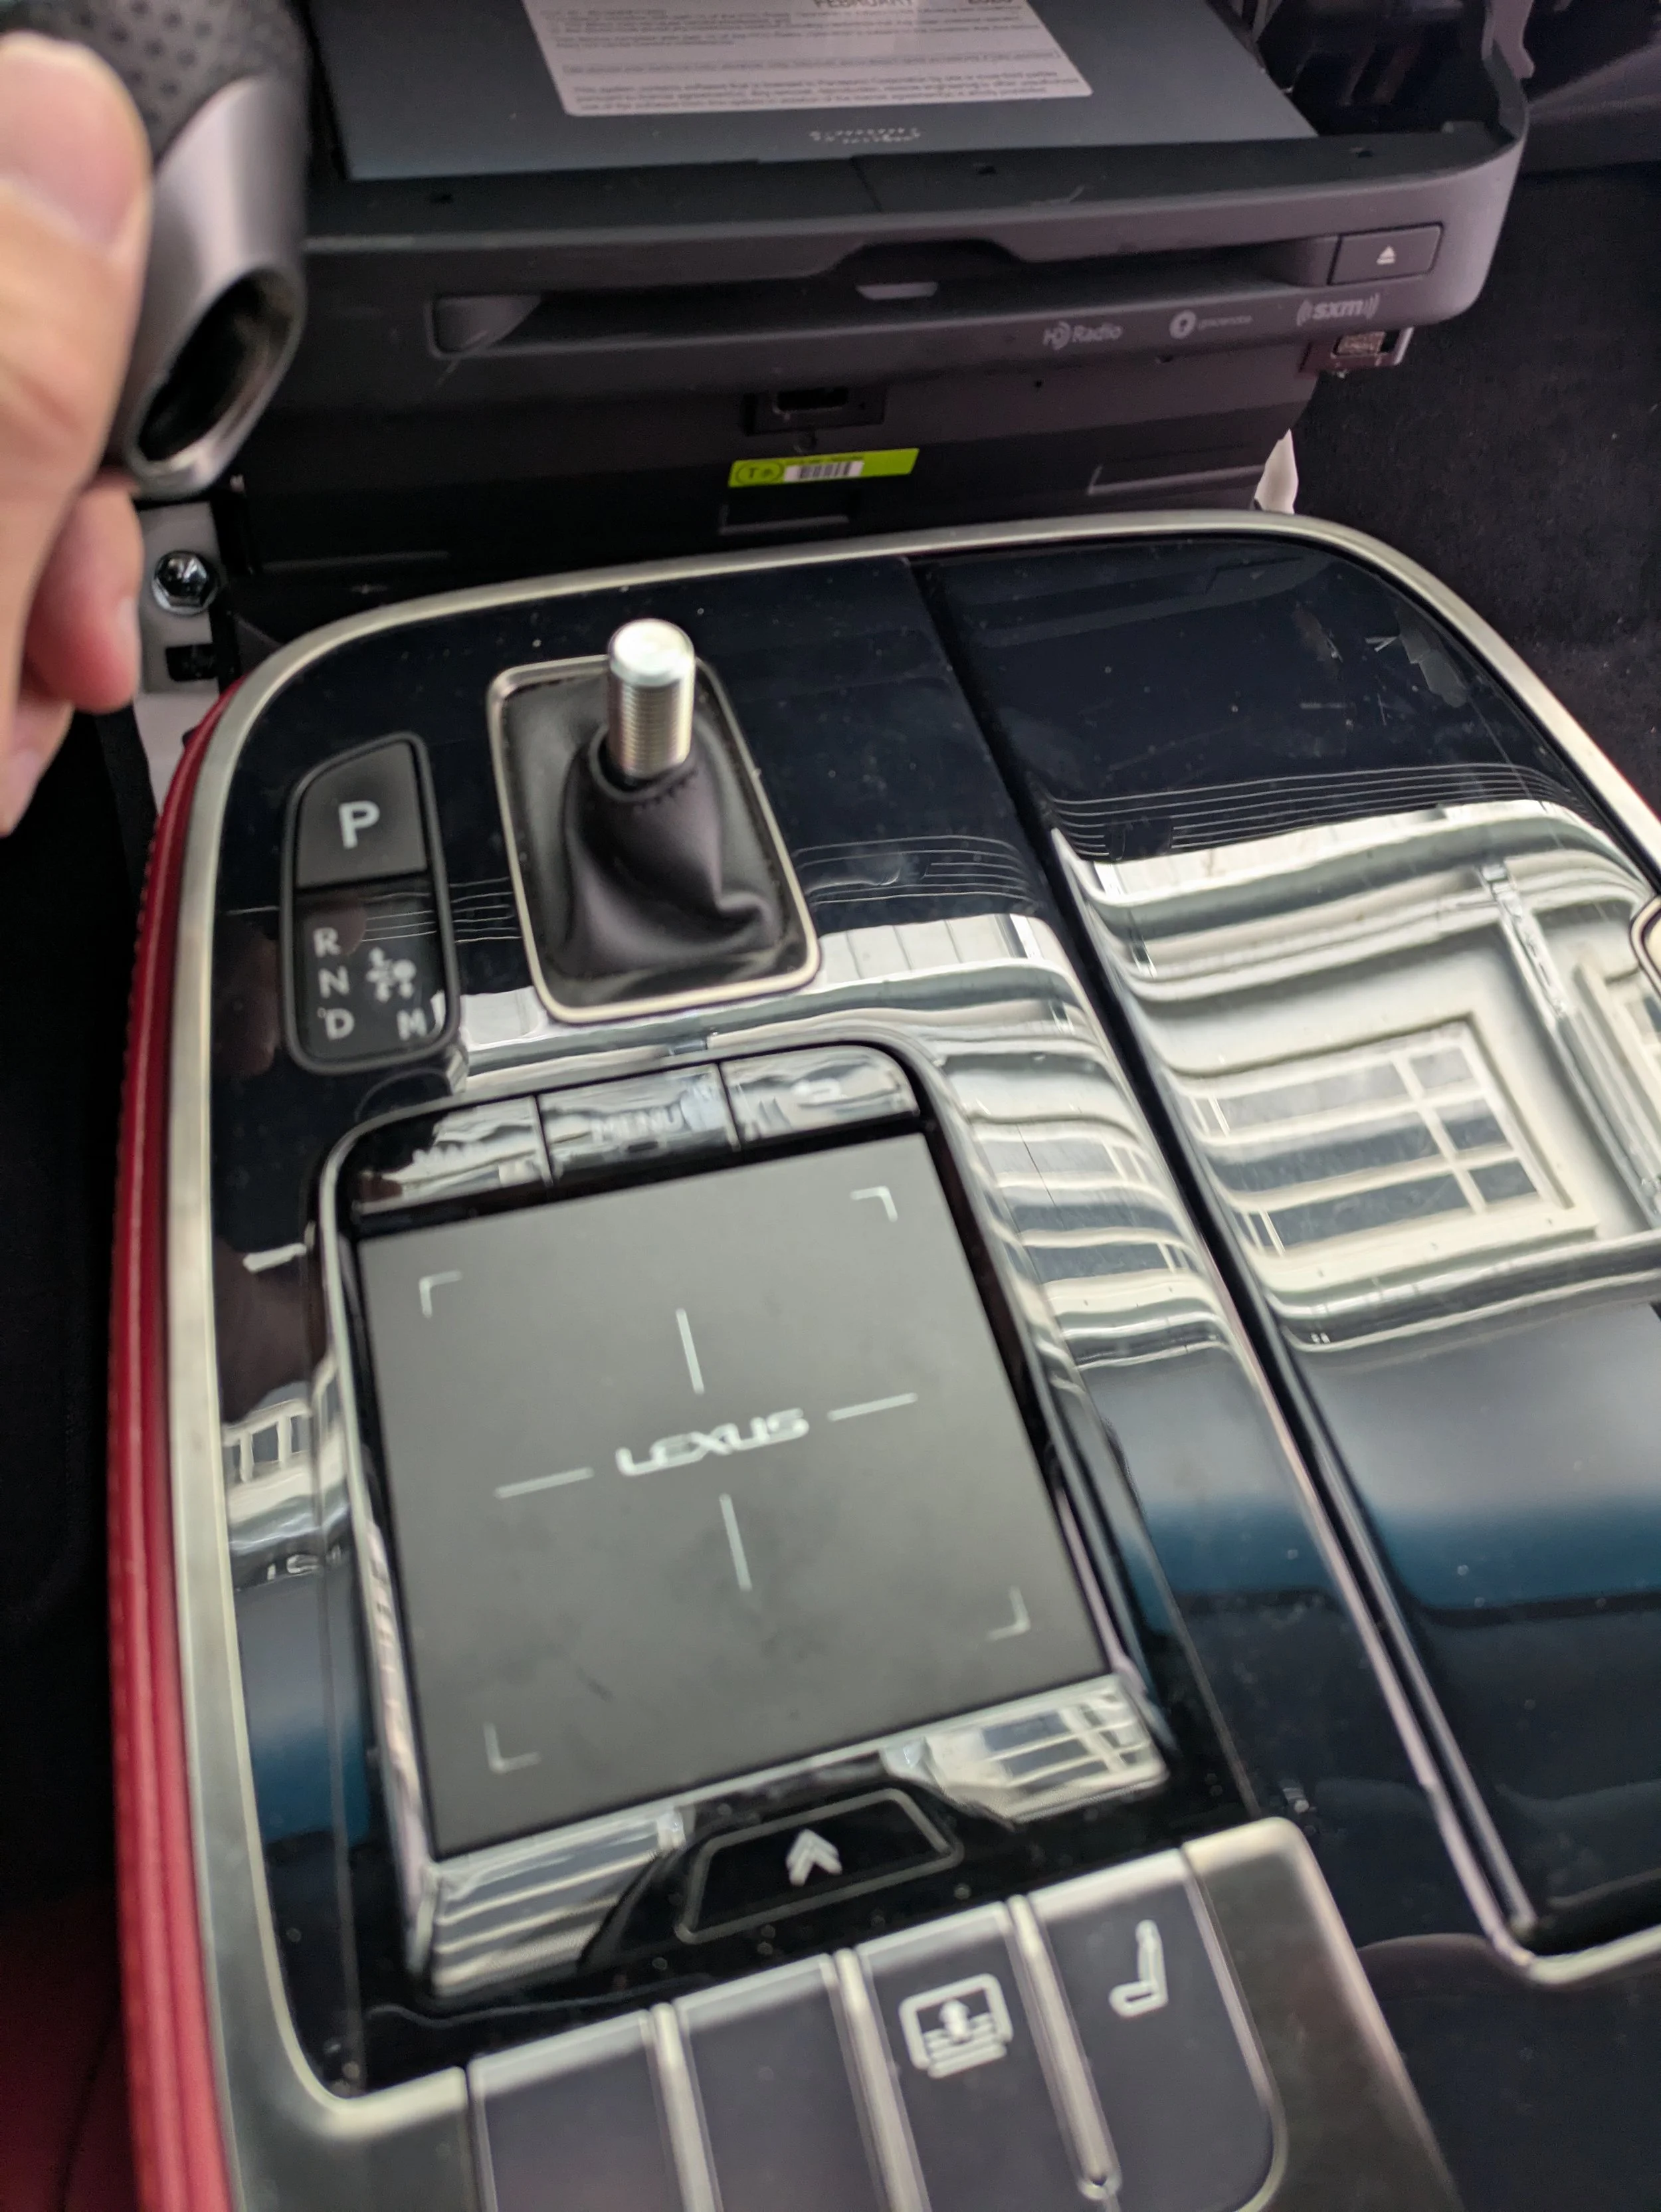
The knob just screws off!
Not sure why I don’t have a picture of this but basically your pry tool goes between the leather trim and the silver trim of the shift console and the piece come right up!
p.s. I removed the trim under the red leather because I wanted to see what I was working with under it. It’s not necessary for this project.

I’m only one man so there was no way I was going to take pictures of me taking this system out, disconnect cables and not yell, scream and shout!
Basically the system comes out, the cables are all stupid short and if you have huge hands (which thankfully I don’t) good luck trying to get these harnesses disconnected!
And you wanted to see pictures of me doing that LOL NOPE!
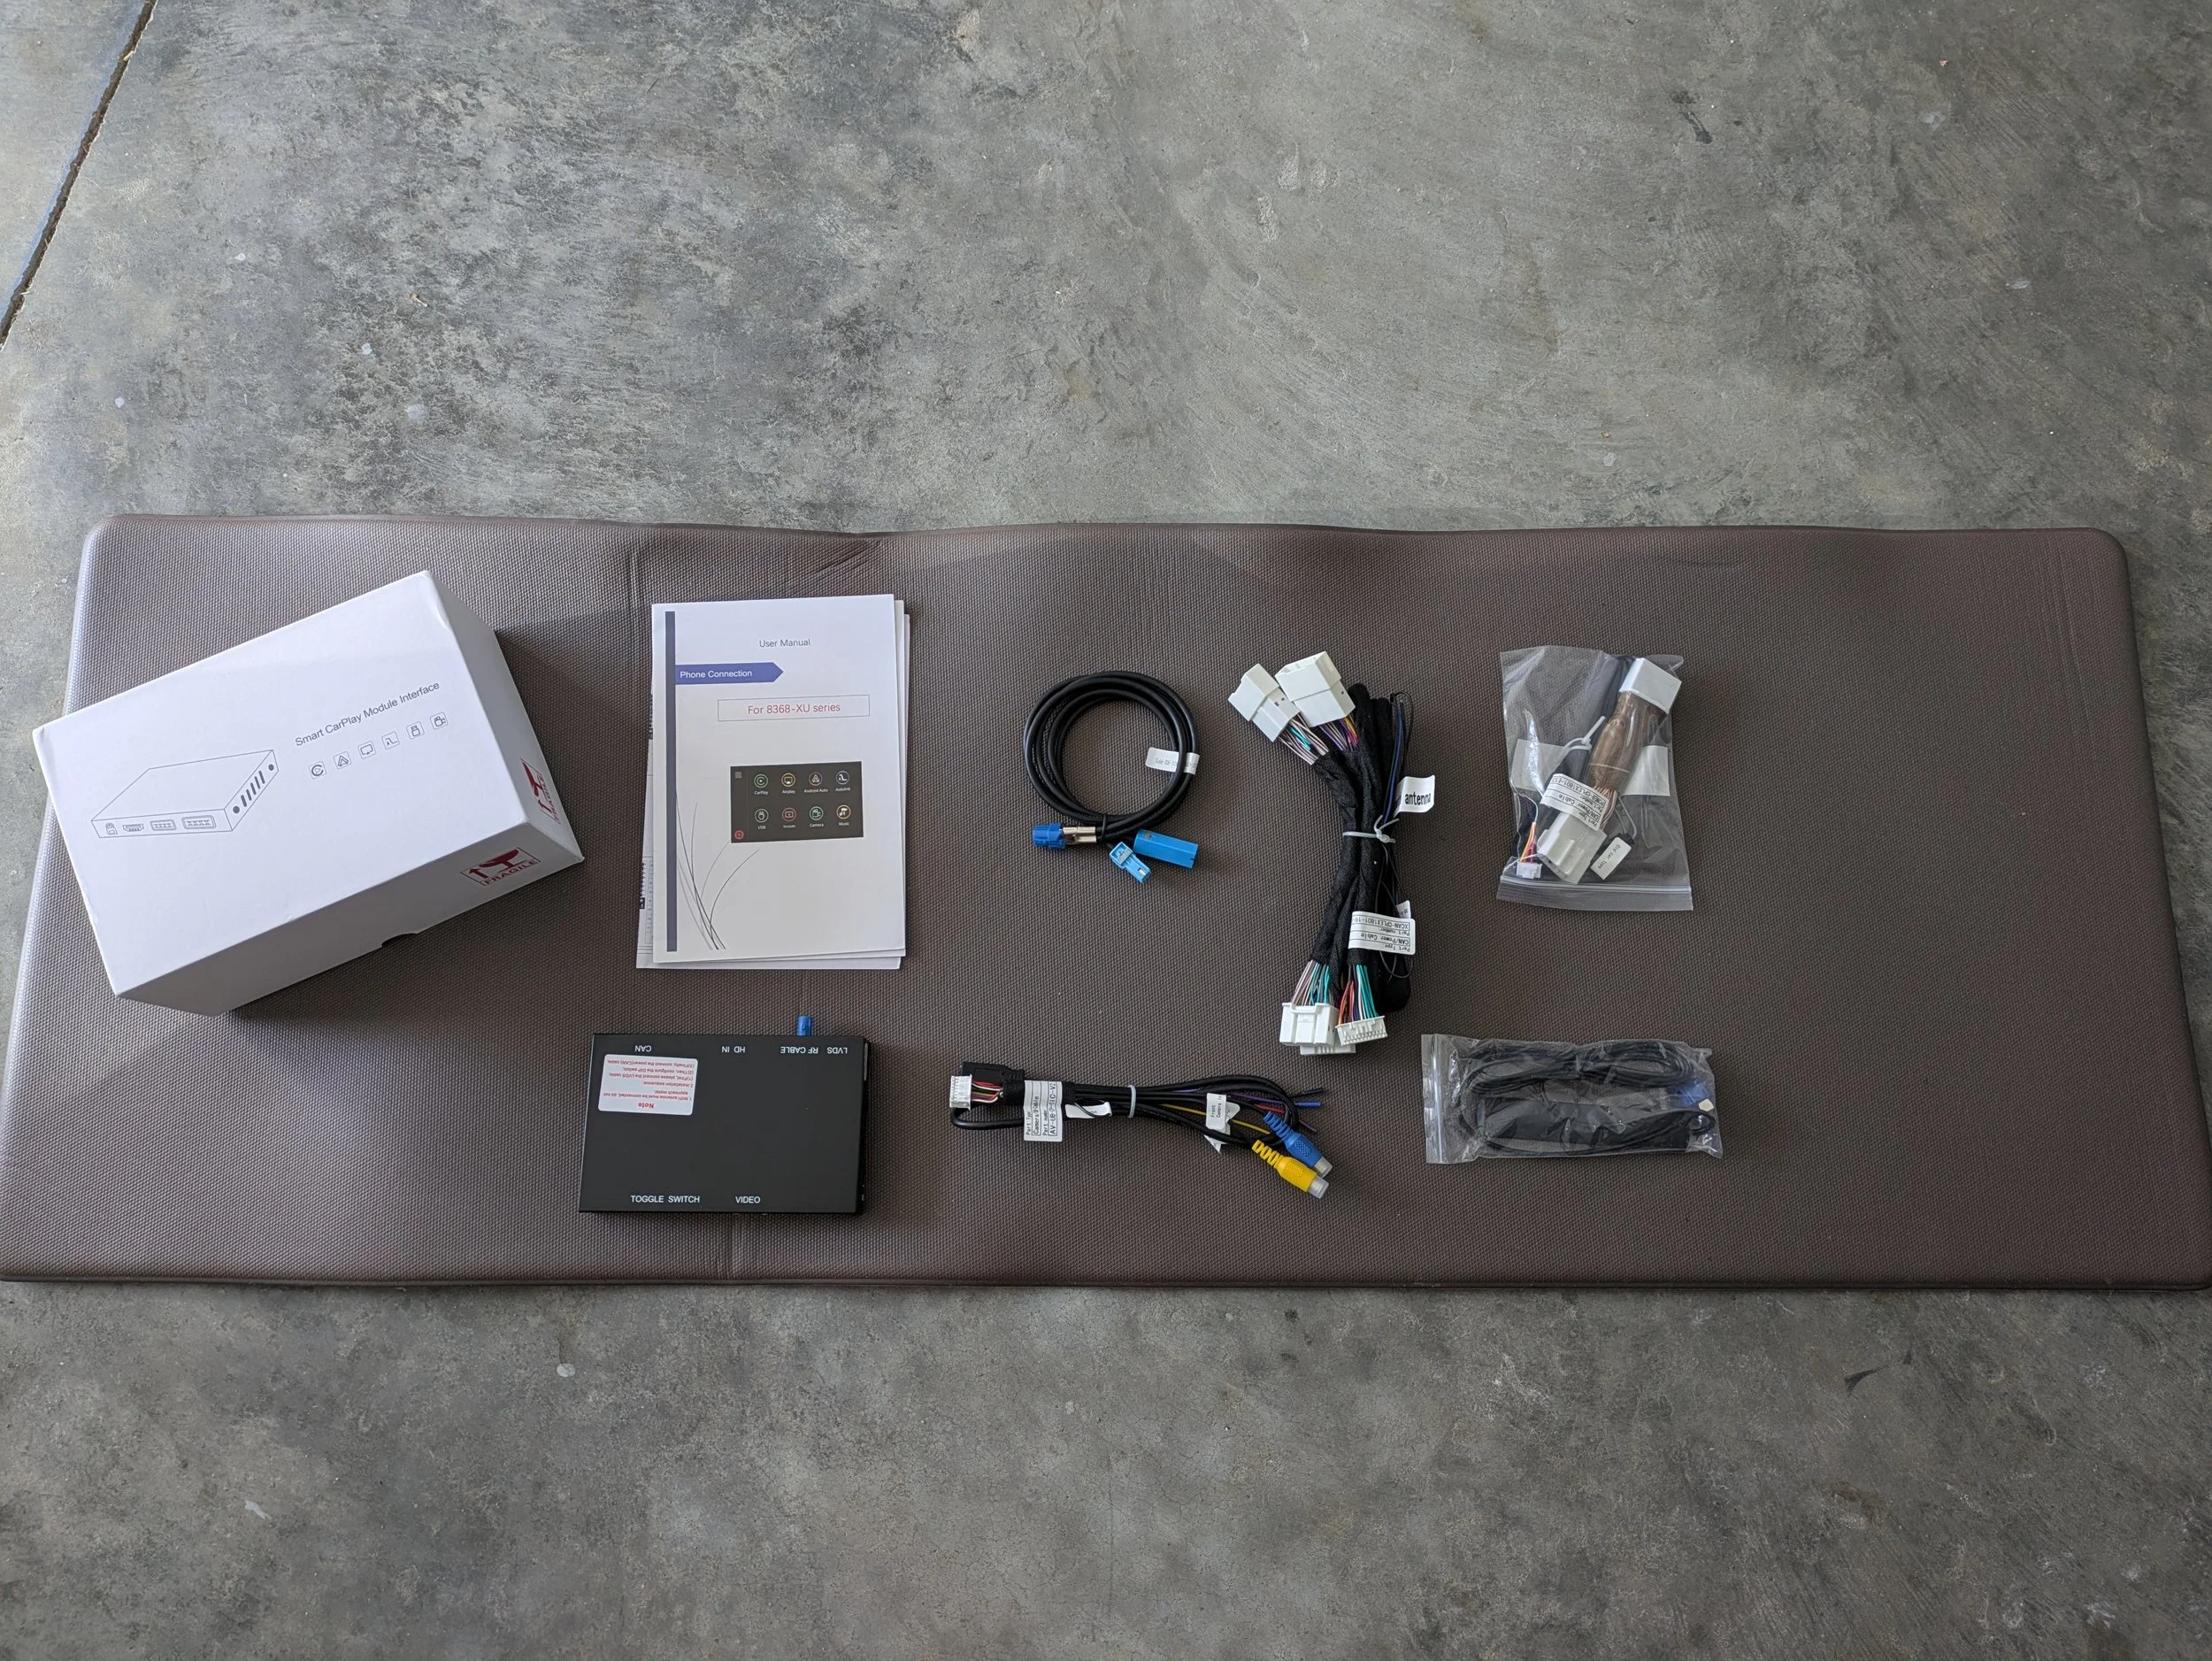
Ok the aftermarket system! This is what comes in the box. The receiver/decoder (which is the black box) the manuals (which are garbage!) the LVDS cable (Black cable with 3 blue connections and is used to intercept the video) the power/data cables (the biggest cable bundle) the USB port for updates and aftermarket cameras (the only cable with a yellow connection) a WIFI antenna for Wireless Android Auto/Apple CarPlay (the smaller bagged cable), and lastly a cable for older cars (the other bagged cable).
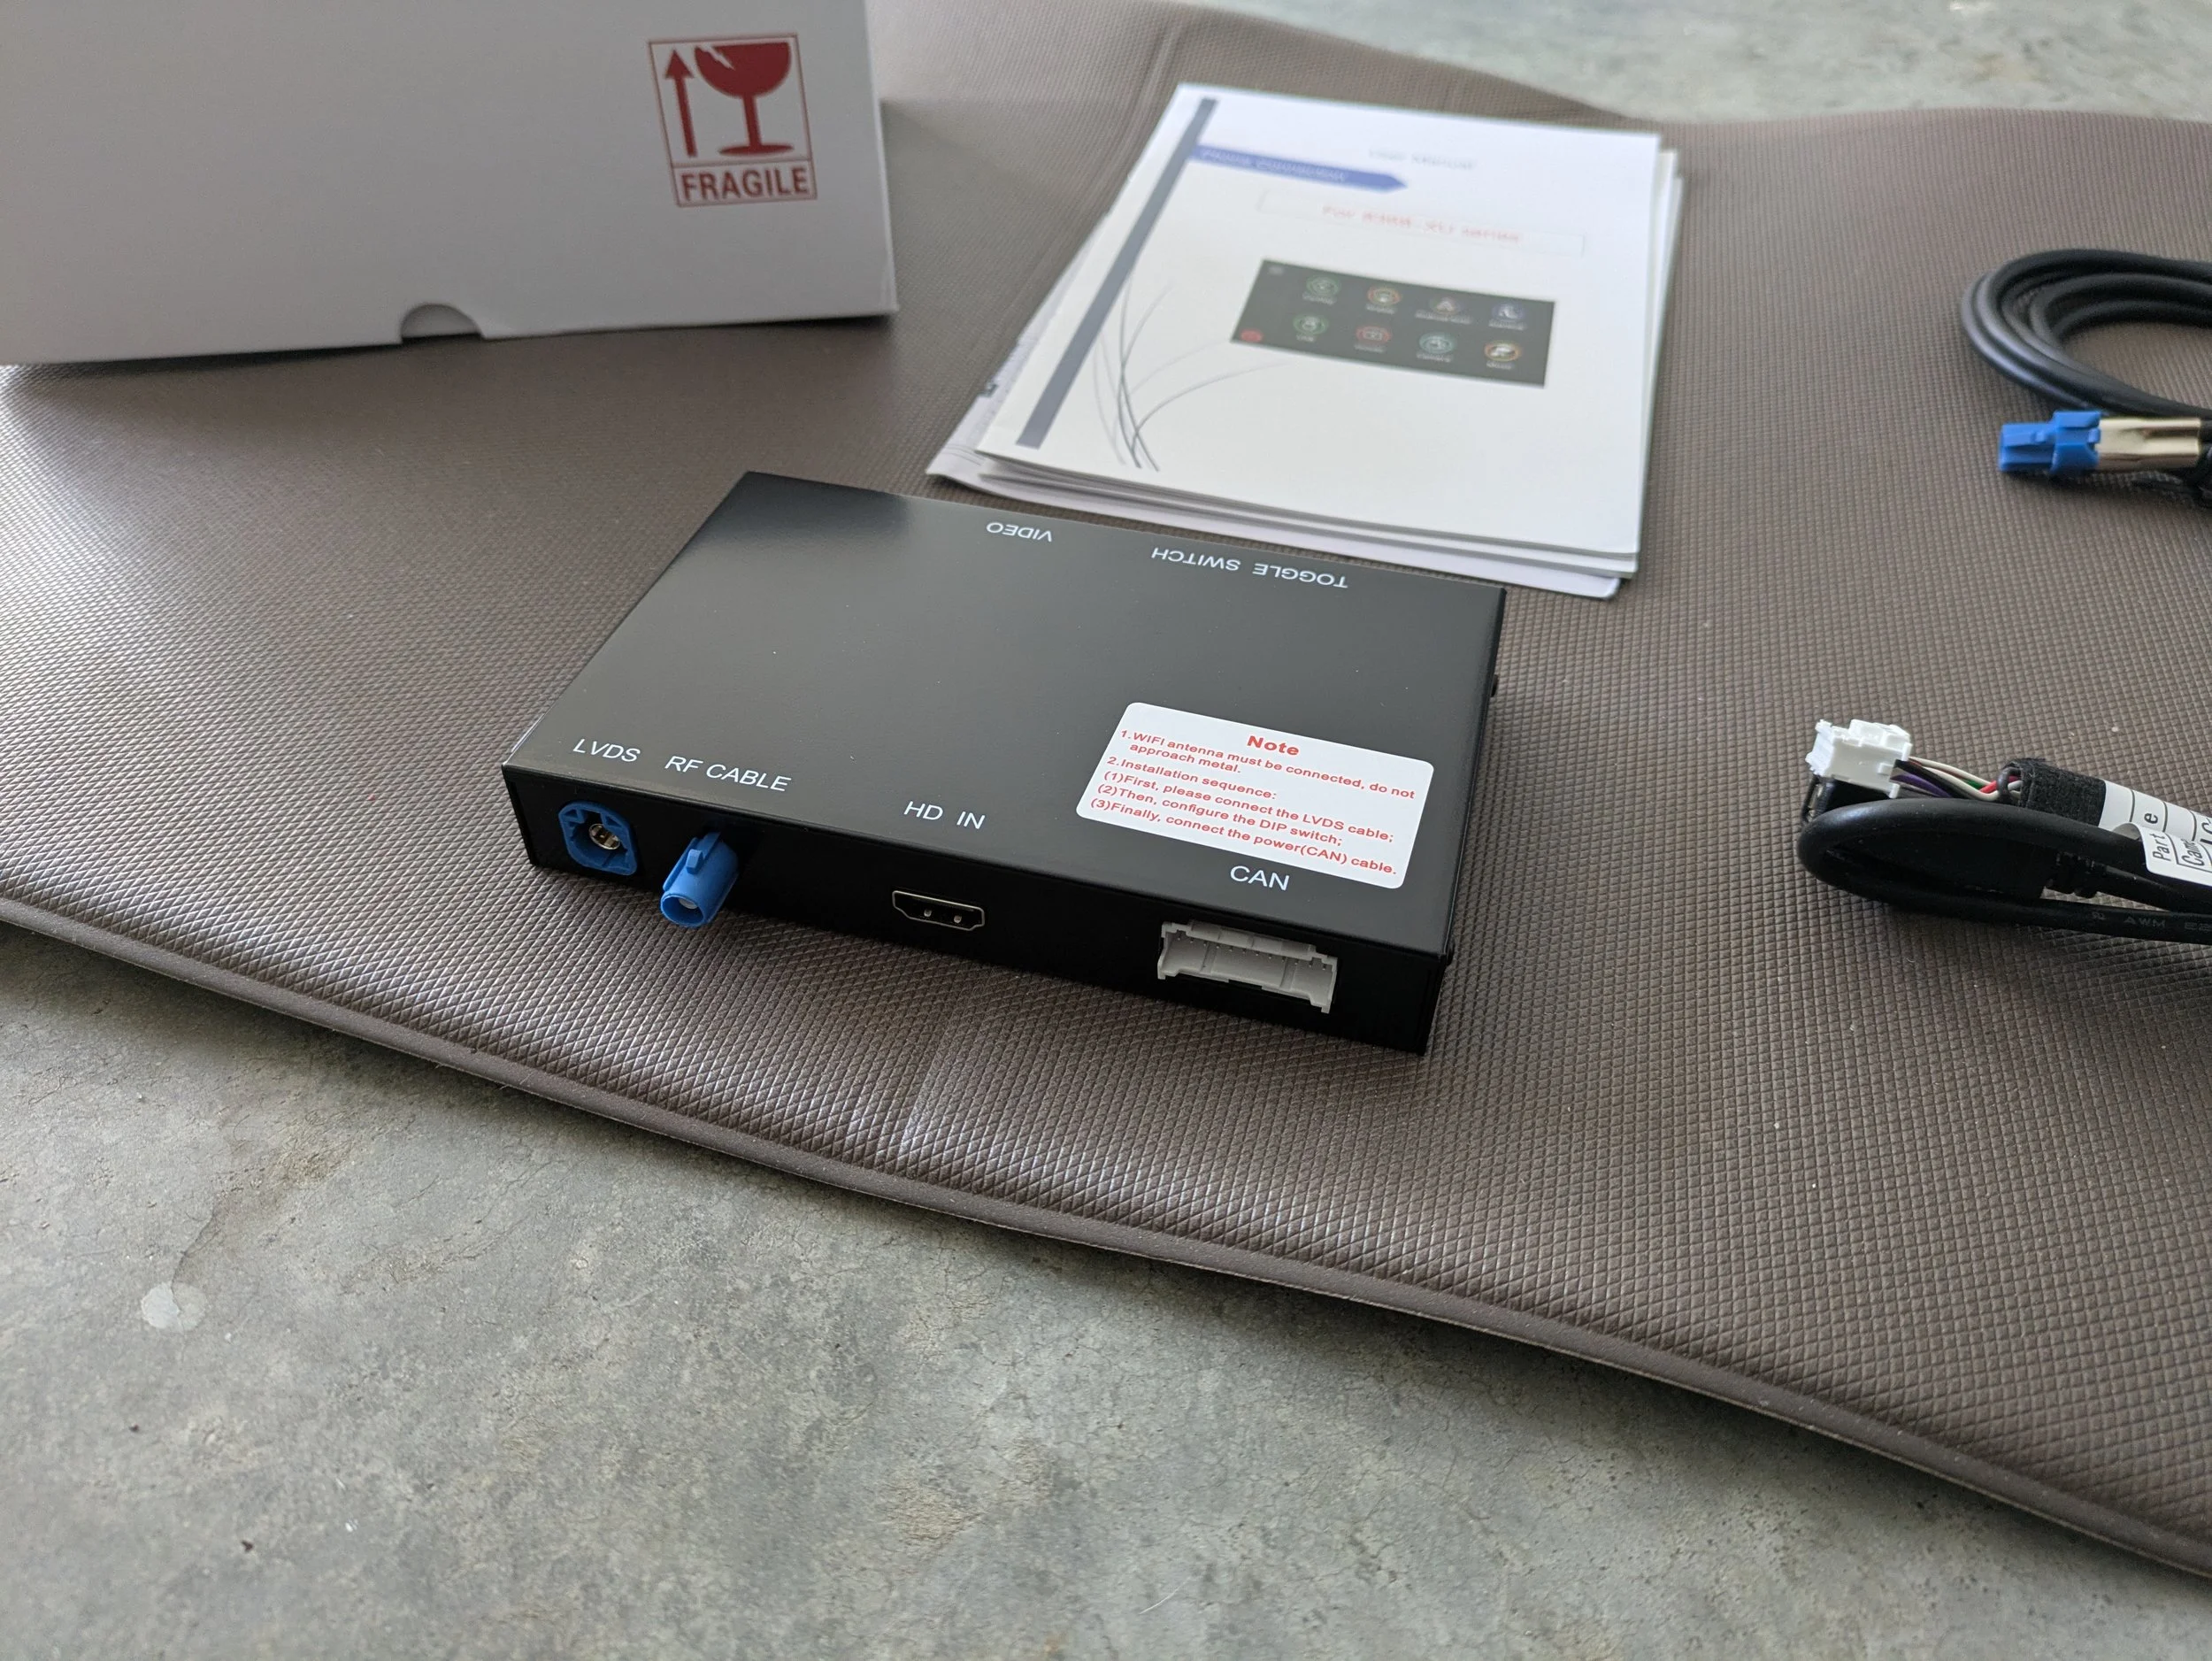
Basically only two ports connects directly to the factory system which are the LVDS port (video) and CAN (power and other communication). The RF Cable is for the WIFI ant.
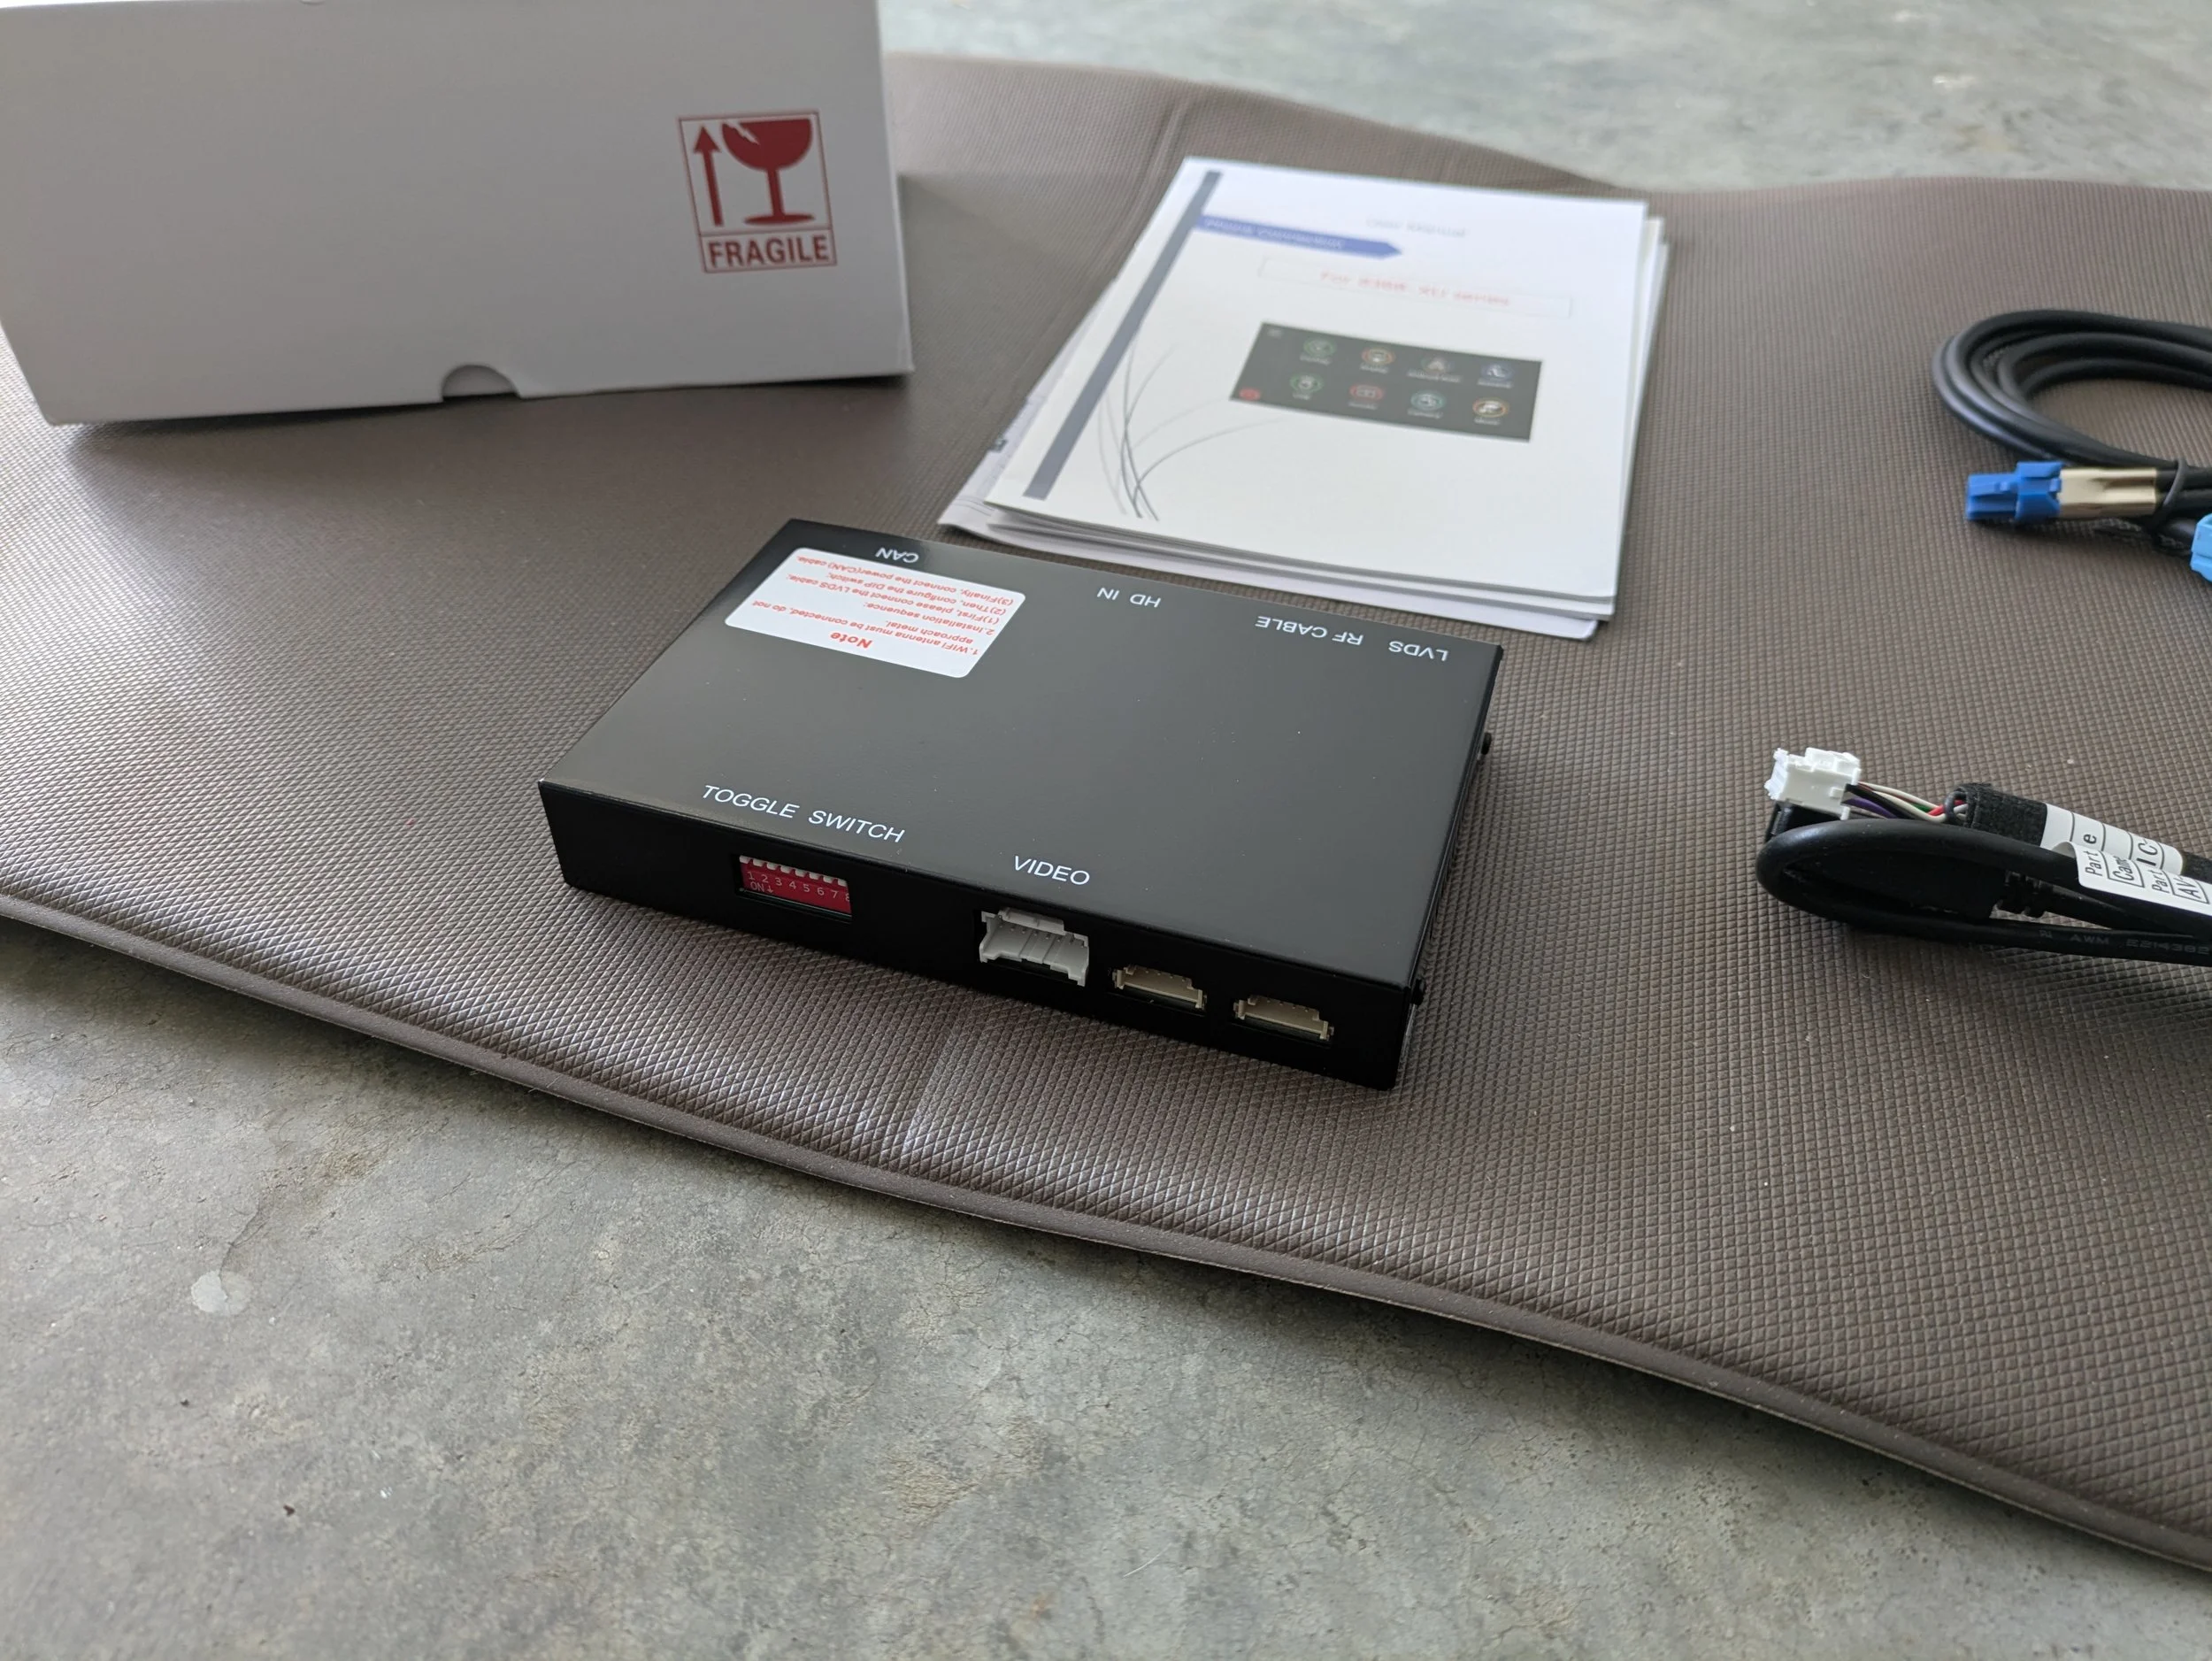
The toggle Switch determines how to decode the signal that’s coming in (for this car it’s Toggle switch 2 and 4 on). The video (I don’t know why they call it that) its for USB updates and 3rd party cameras. I literally did nothing with the “video” cable other than run the USB port to an accessible location and mount the Bluetooth antenna which I’ll show later on.
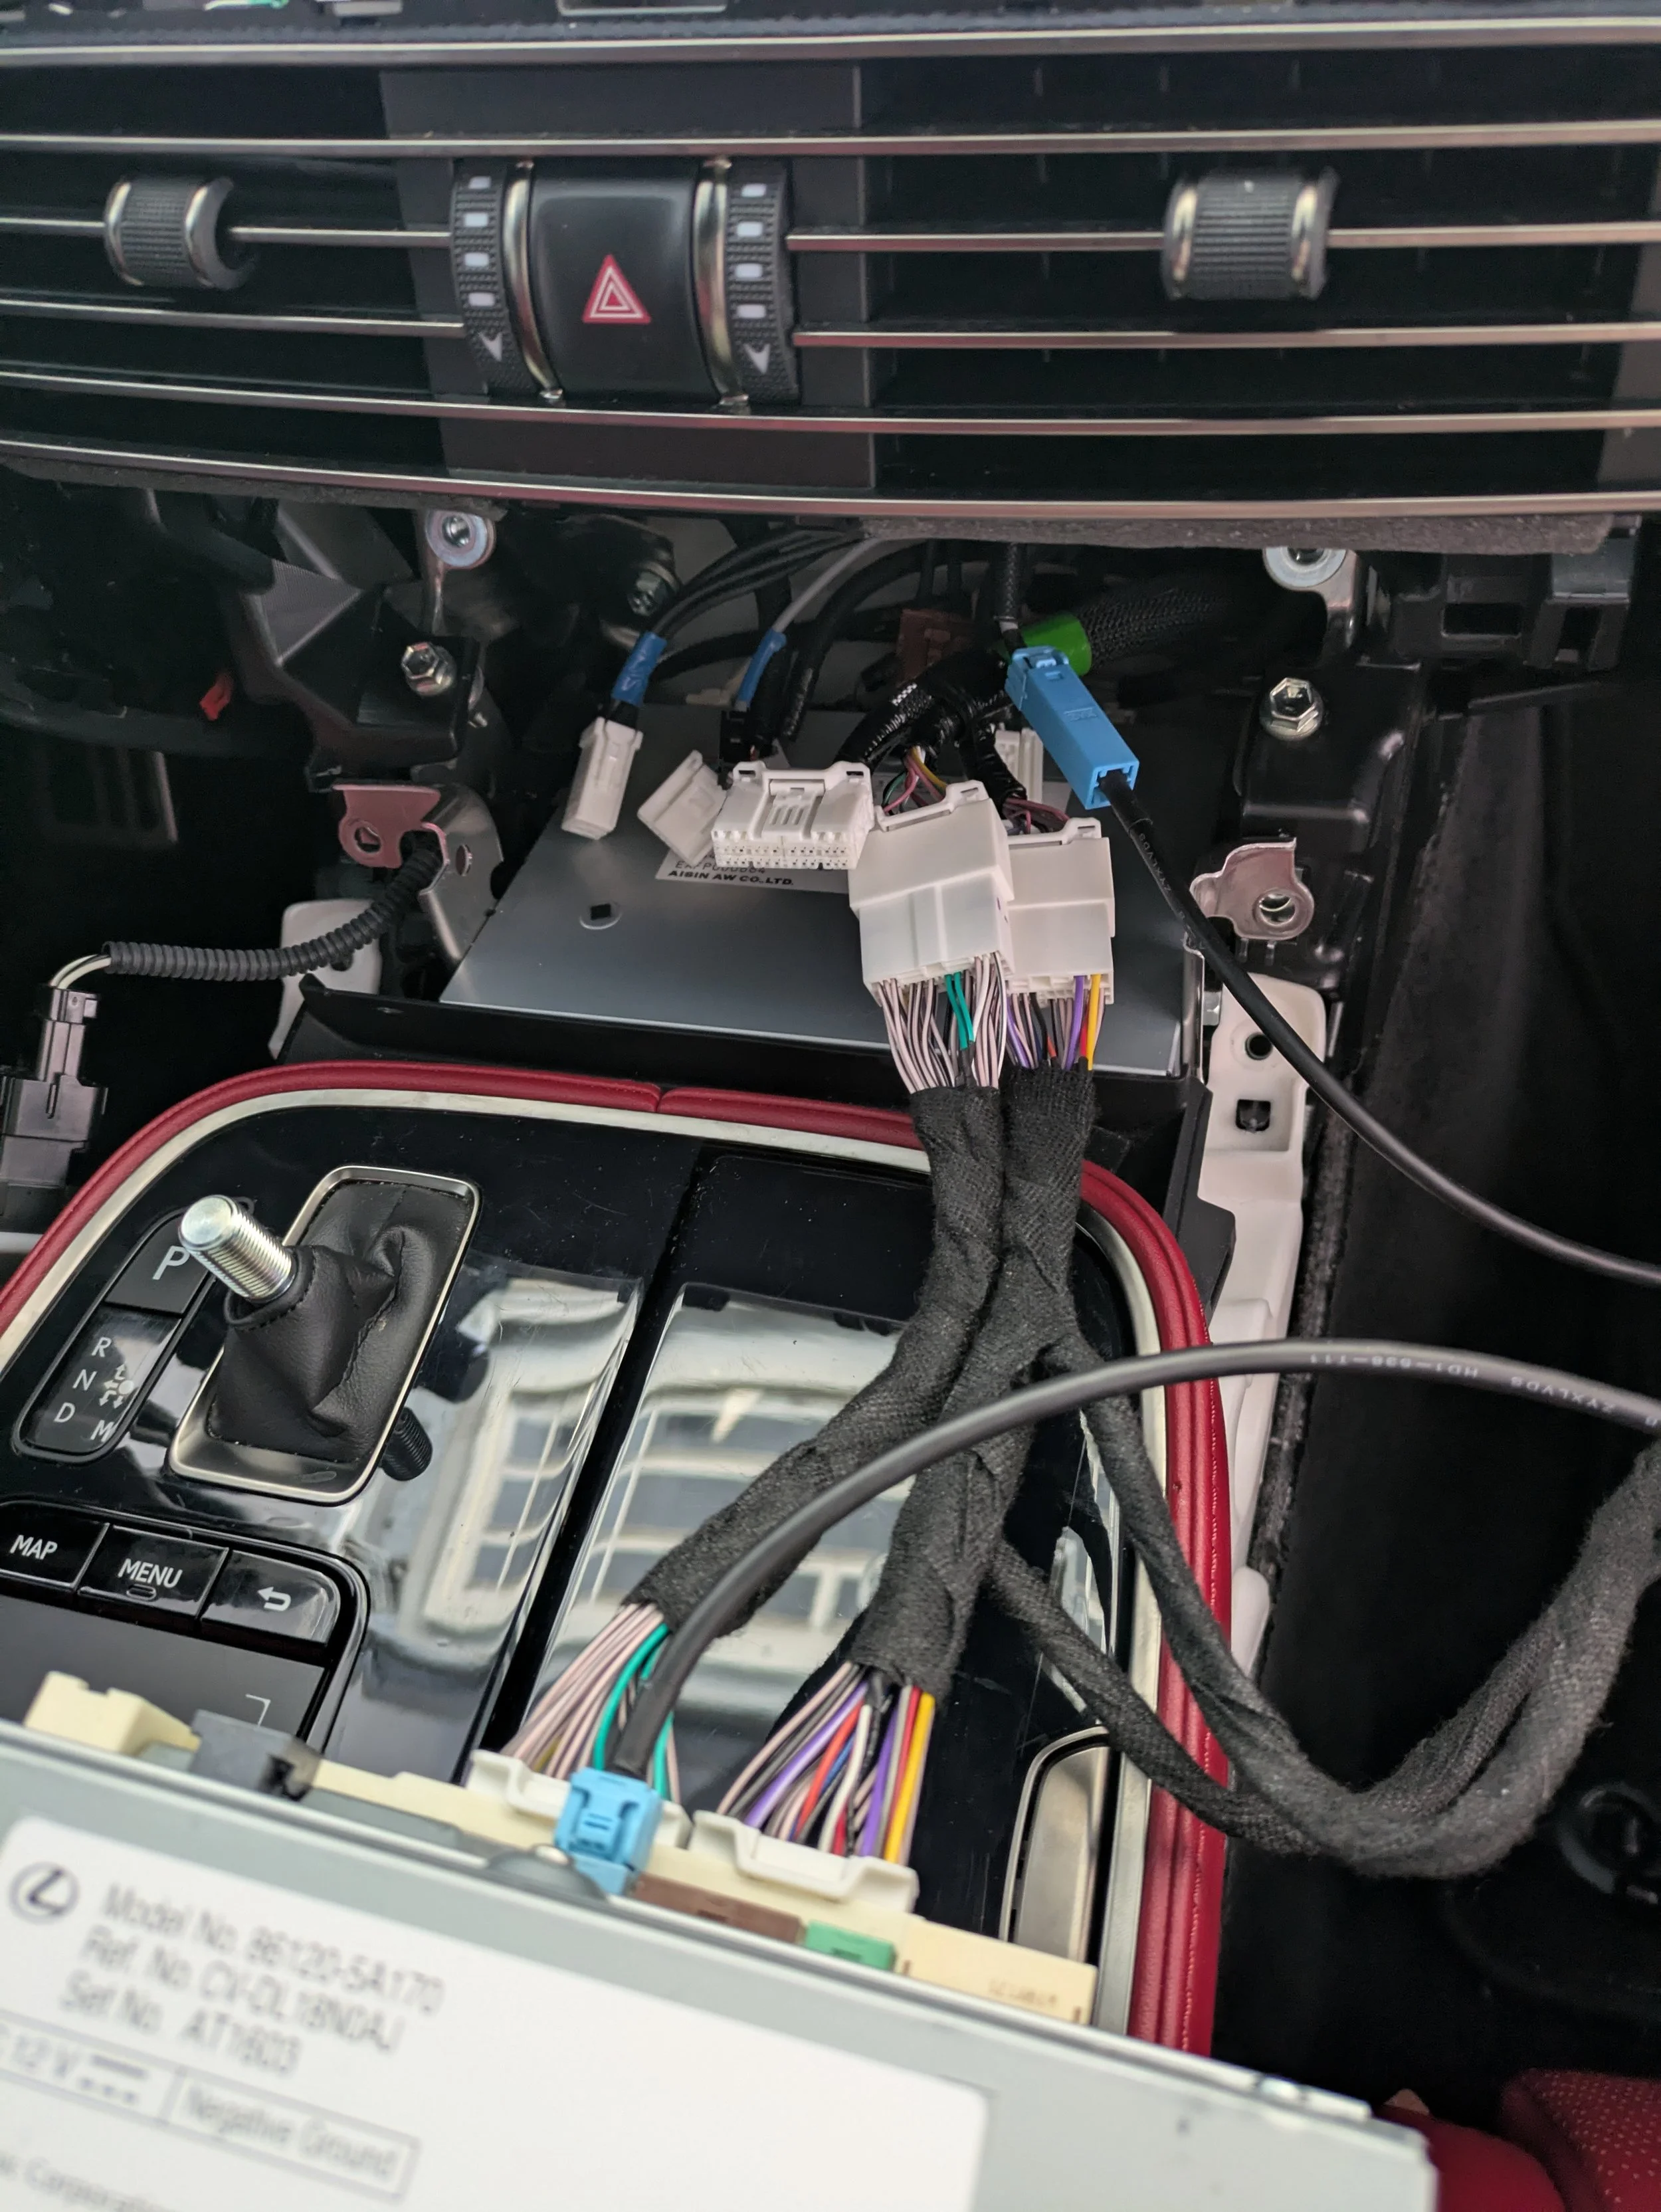
At this point, you take the large cable harness, plug it into the CAN part of the aftermarket box and the these cable go between the factory system and it’s cables. I thought it was straight forward for the blue LVDS but NOOOOO, I had a rude awakening after I tried testing the unit… Thank God I didn’t put everything back together and have to pull it all apart!

Ok… let’s pause for a moment and look at my beautiful puppy Sarah Lee while I try to explain why I had to take the whole dashboard apart to remove the screen! LoL
Sooo….
When I got the harnesses placed in I went ahead and hooked the battery back up, turned on the car and nothing… The car turned on, the car was working as usual, I even heard the Lexus system booting up and chime on the speakers but the screen was black.
I thought maybe I needed to change the toggle switches, even though I knew I read the combination for this model car. I tried the other toggle combinations and NOPE! After going back and forth troubleshooting I finally gave up for the evening…
Now mind you, not only was this project pushing my nerves because the “troubleshooting” steps of the guide was only two options followed by…"contact us if you still have problems” I also made the day a “cheat day” and had some horrible food along with candy AND….
Forgot I had my follow-up doctors appointment the next morning LOL
THANKFULLY my doctor told me my next bloodwork wasn’t going to be done until Dec. and she laughed and said I am doing great! I lost 7 pounds, my blood pressure dropped to normal and I seem more energetic. The whole cholesterol thing we will address in 9 months when I do my next blood work but she said she is sure it’s looking good!
Anyway….
Right after the appointment I grabbed some breakfast and tried to breath, have some quiet time and relax until the outside warmed a little bit.
Because of my quiet time and just letting the Holy Spirit speak to me, I was able to get outside of my normal “thinking” head and let God point me in the direction to troubleshoot.
I did end up emailing tech support but I figured it out before they could respond and here’s what I found out….
The blue LDVS cable yeah….. The cable that came with the aftermarket box had one female connector and one male while the factory system and screen both have female connectors with one cable connecting them together (a male to male cable).
In my logical head…
I figured I would plug the aftermarket male connector into the back of the system and then connect the female aftermarket cable into the male end of the cable that runs up to the factory screen but NOOOOOO
Some really bright person who designed the aftermarket box decided that the male end of the aftermarket cable needed to be plugged directly into the back of the screen and the female connector on the aftermarket cable would then connect to the factory cable that originally plugged into the screen.
You know what that means?!?!
I had to take the whole dash apart so I could get to the back of the screen so HERE WE ARE! YEAHHHH!!!

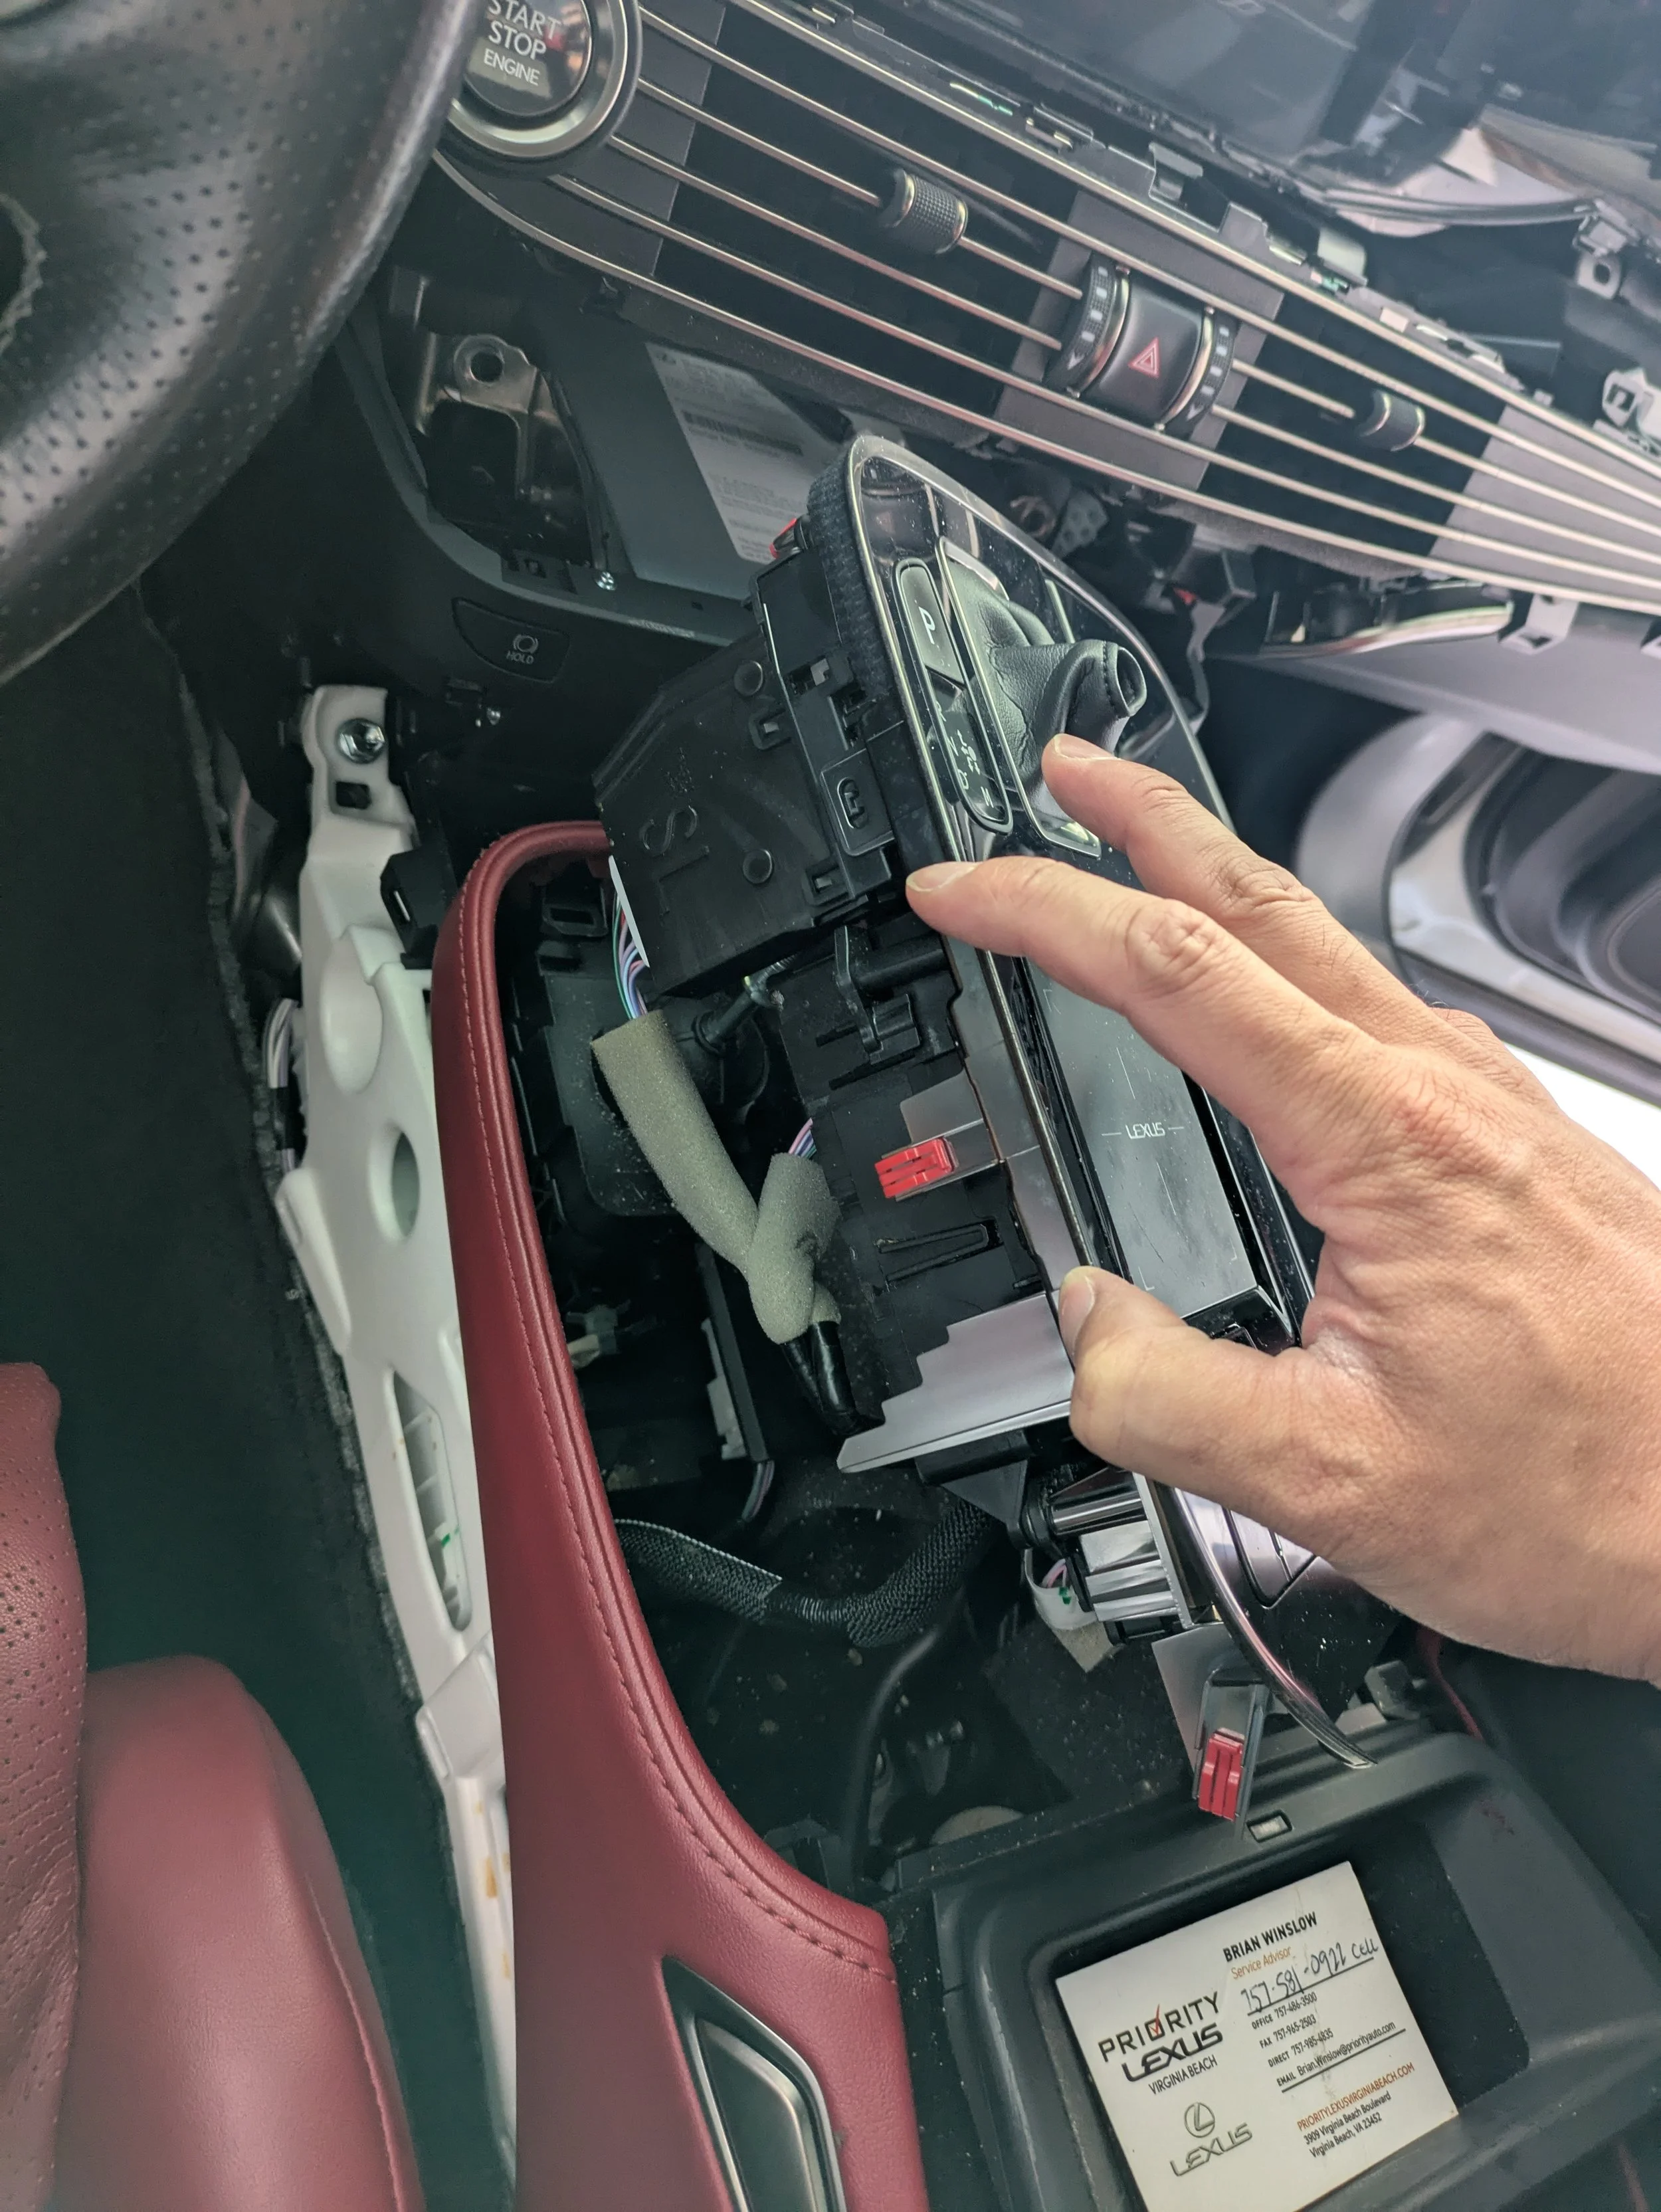
I had no desire to go through the process of taking pictures of how to remove this screen. It’s straight forward for the most part. Remove the top panel trim which I showed in previous pictures (you do have to pop the panel above the steering wheel console up but that literally pops up just by moving it up, which blew my mind! lol) then there are two bolts that hold the screen in place (the bolt holes you can see in this picture) and then that lovely blue male LVDS cable needed to be pulled to put the aftermarket cable in it’s place and the female plugged into the cable I pulled out.
And by the way, yes I suggested to the manufacture to change the cables because it makes no sense to pull the screen! They responded with a generic “thank you for pointing that out, we will pass it on” and I hope they do! lol

And here we are! After a day and a half of work, I get to see the new system works!
Now I had to figure out how on earth to get the system back in with all the “extra wires” AND figure out where on earth I’m going to mount the aftermarket box!
Just as a side note, when you have a fancy sports car with all these extra bells and whistles… every inch of that car is used for something so I was scratching my head for a while lol
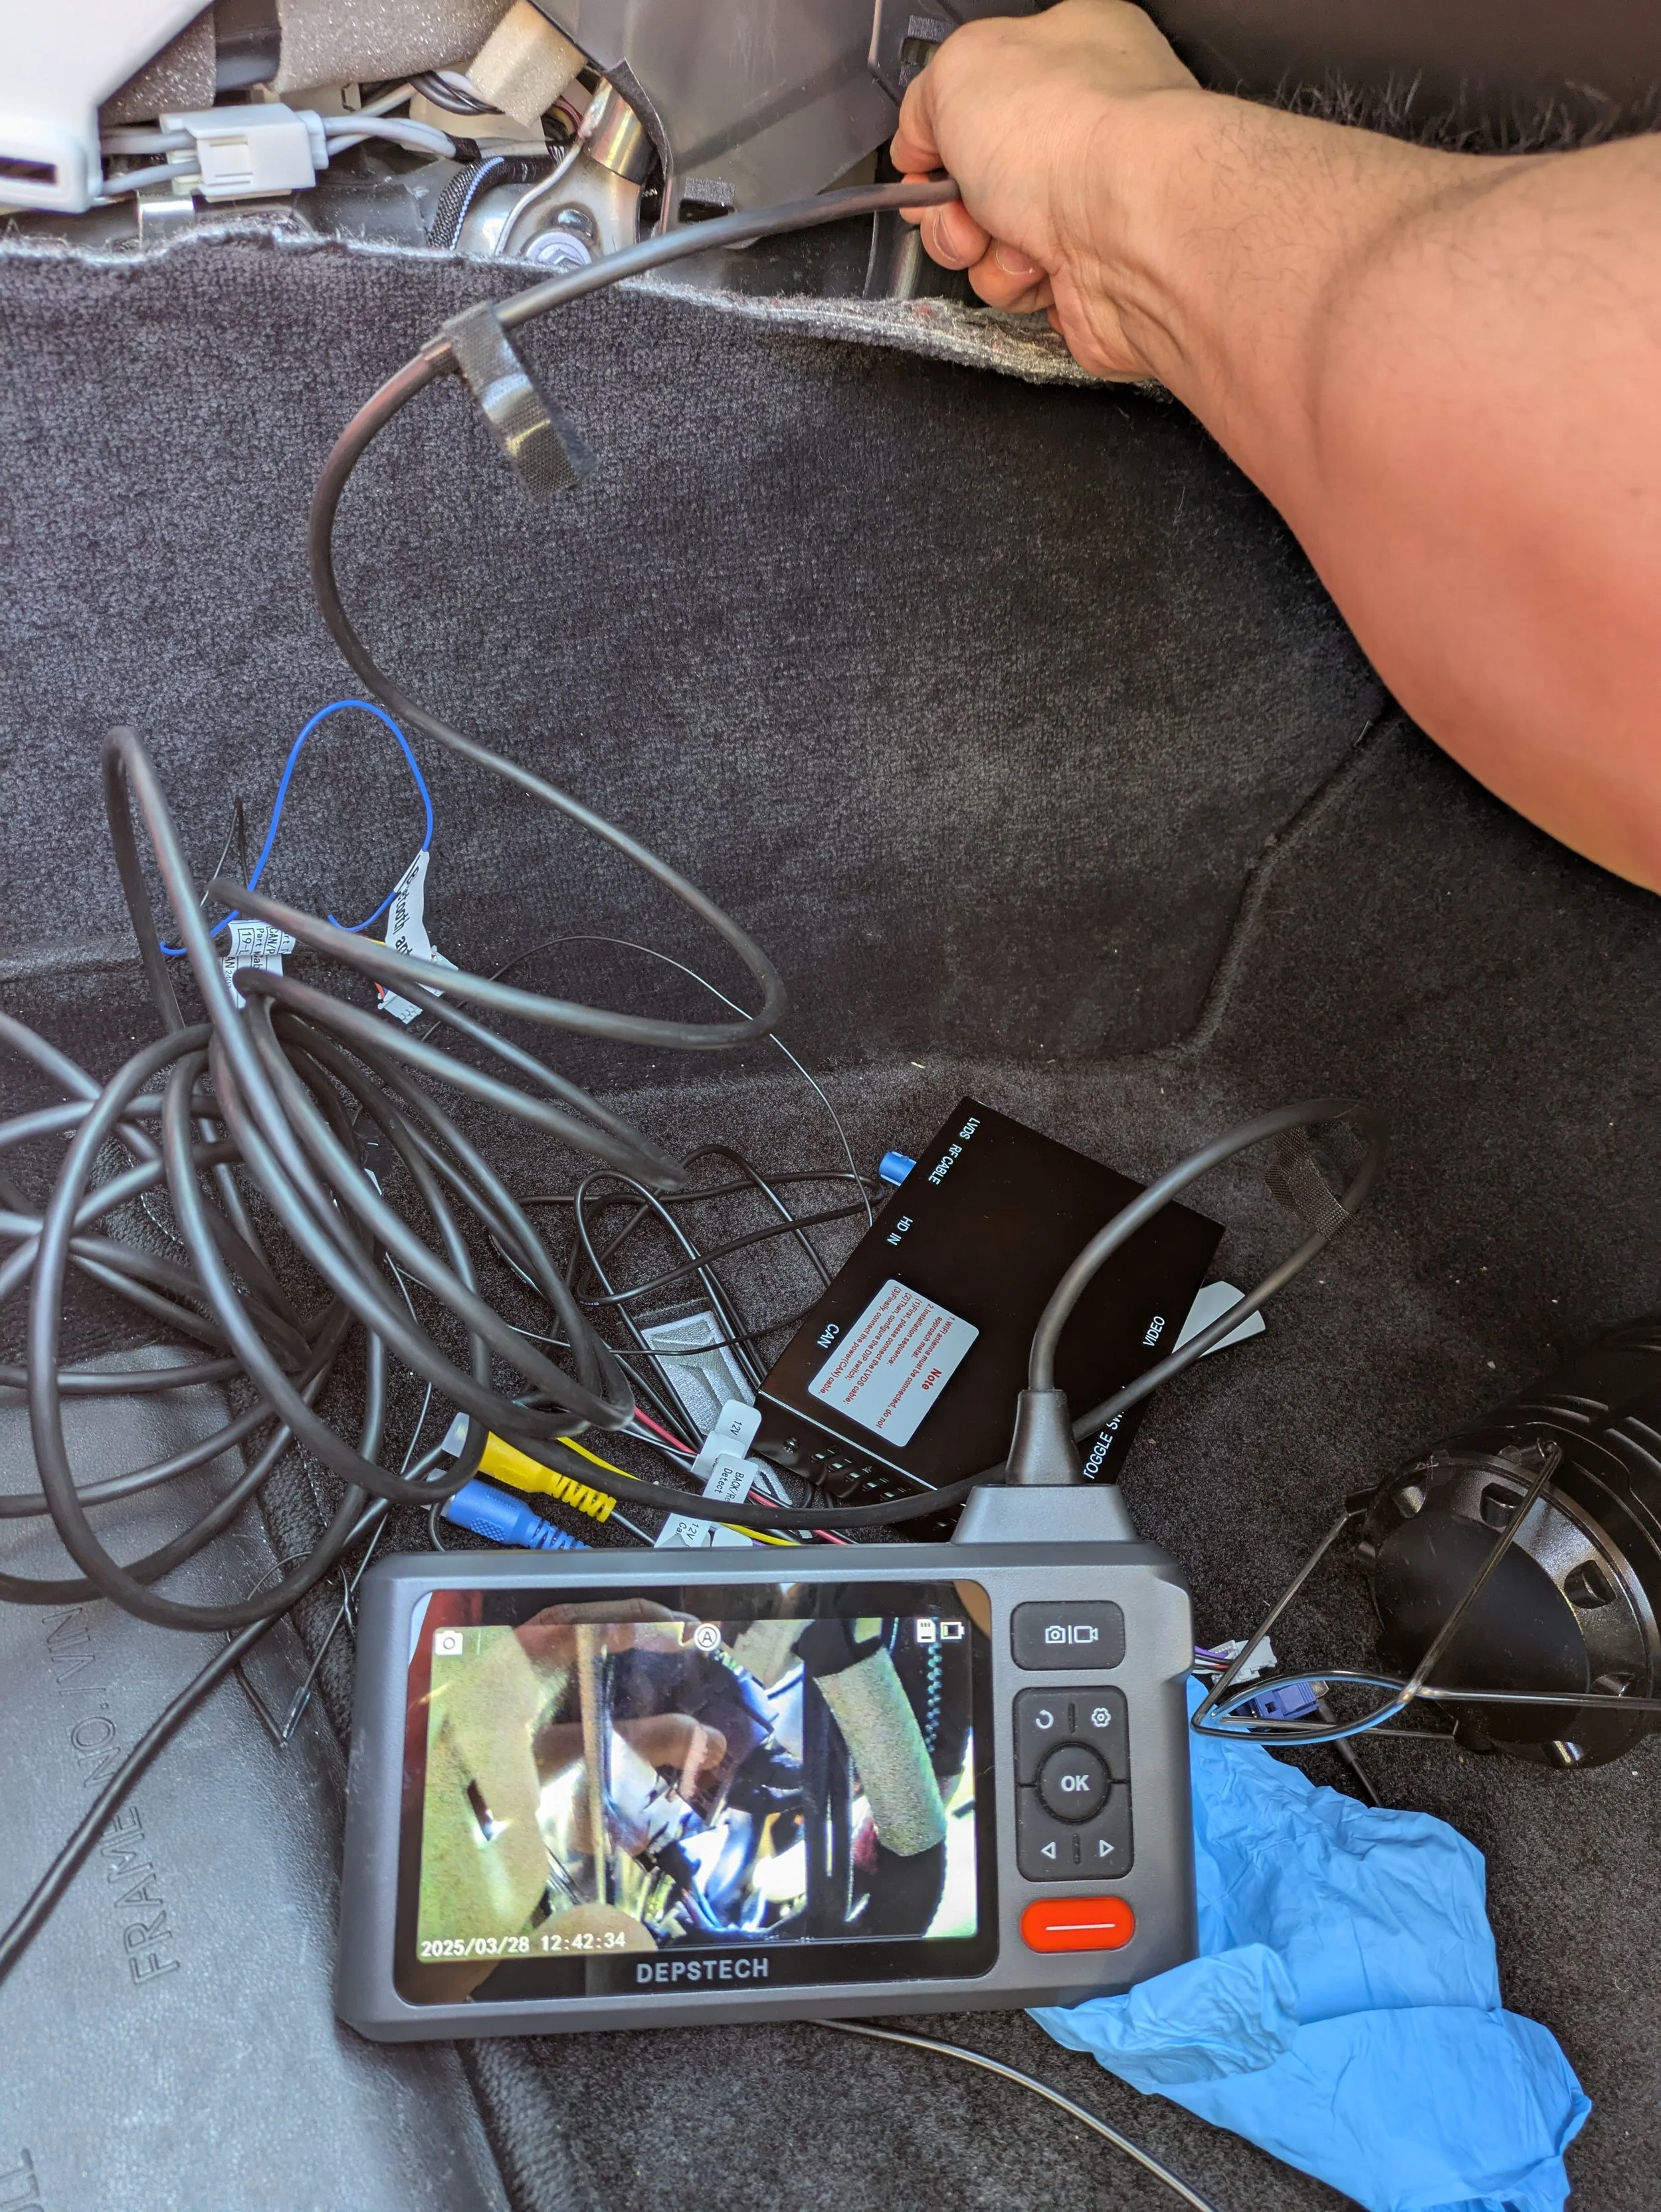
That’s where my Depstech Endoscope came into play! I couldn’t see diddly-squat behind the unit so I had to poke around to see where I could feed cables and I ended up mounting the aftermarket box on the passenger underside panels ( I was not taking pictures of that process because again… I’m one man and I can’t do that and take pictures haha)

I started feeding cables through after I knew where it was open. (By the way the side panels along the center console just pop right off)

I mounted (taped lol) the Bluetooth antenna

I ran the WIFI antenna and USB port through the center console and placed them between the shifter console and the system front face. This was the only “empty” space I did not see used! I have no clue what it’s for… maybe a pen? lol but the the antenna and usb port sits perfectly in that space. FYI I have no clue what I didn’t take a picture with the USB port but just image another cable sitting on top of it for easy access to the driver to plug in their phone or usb flash drive haha
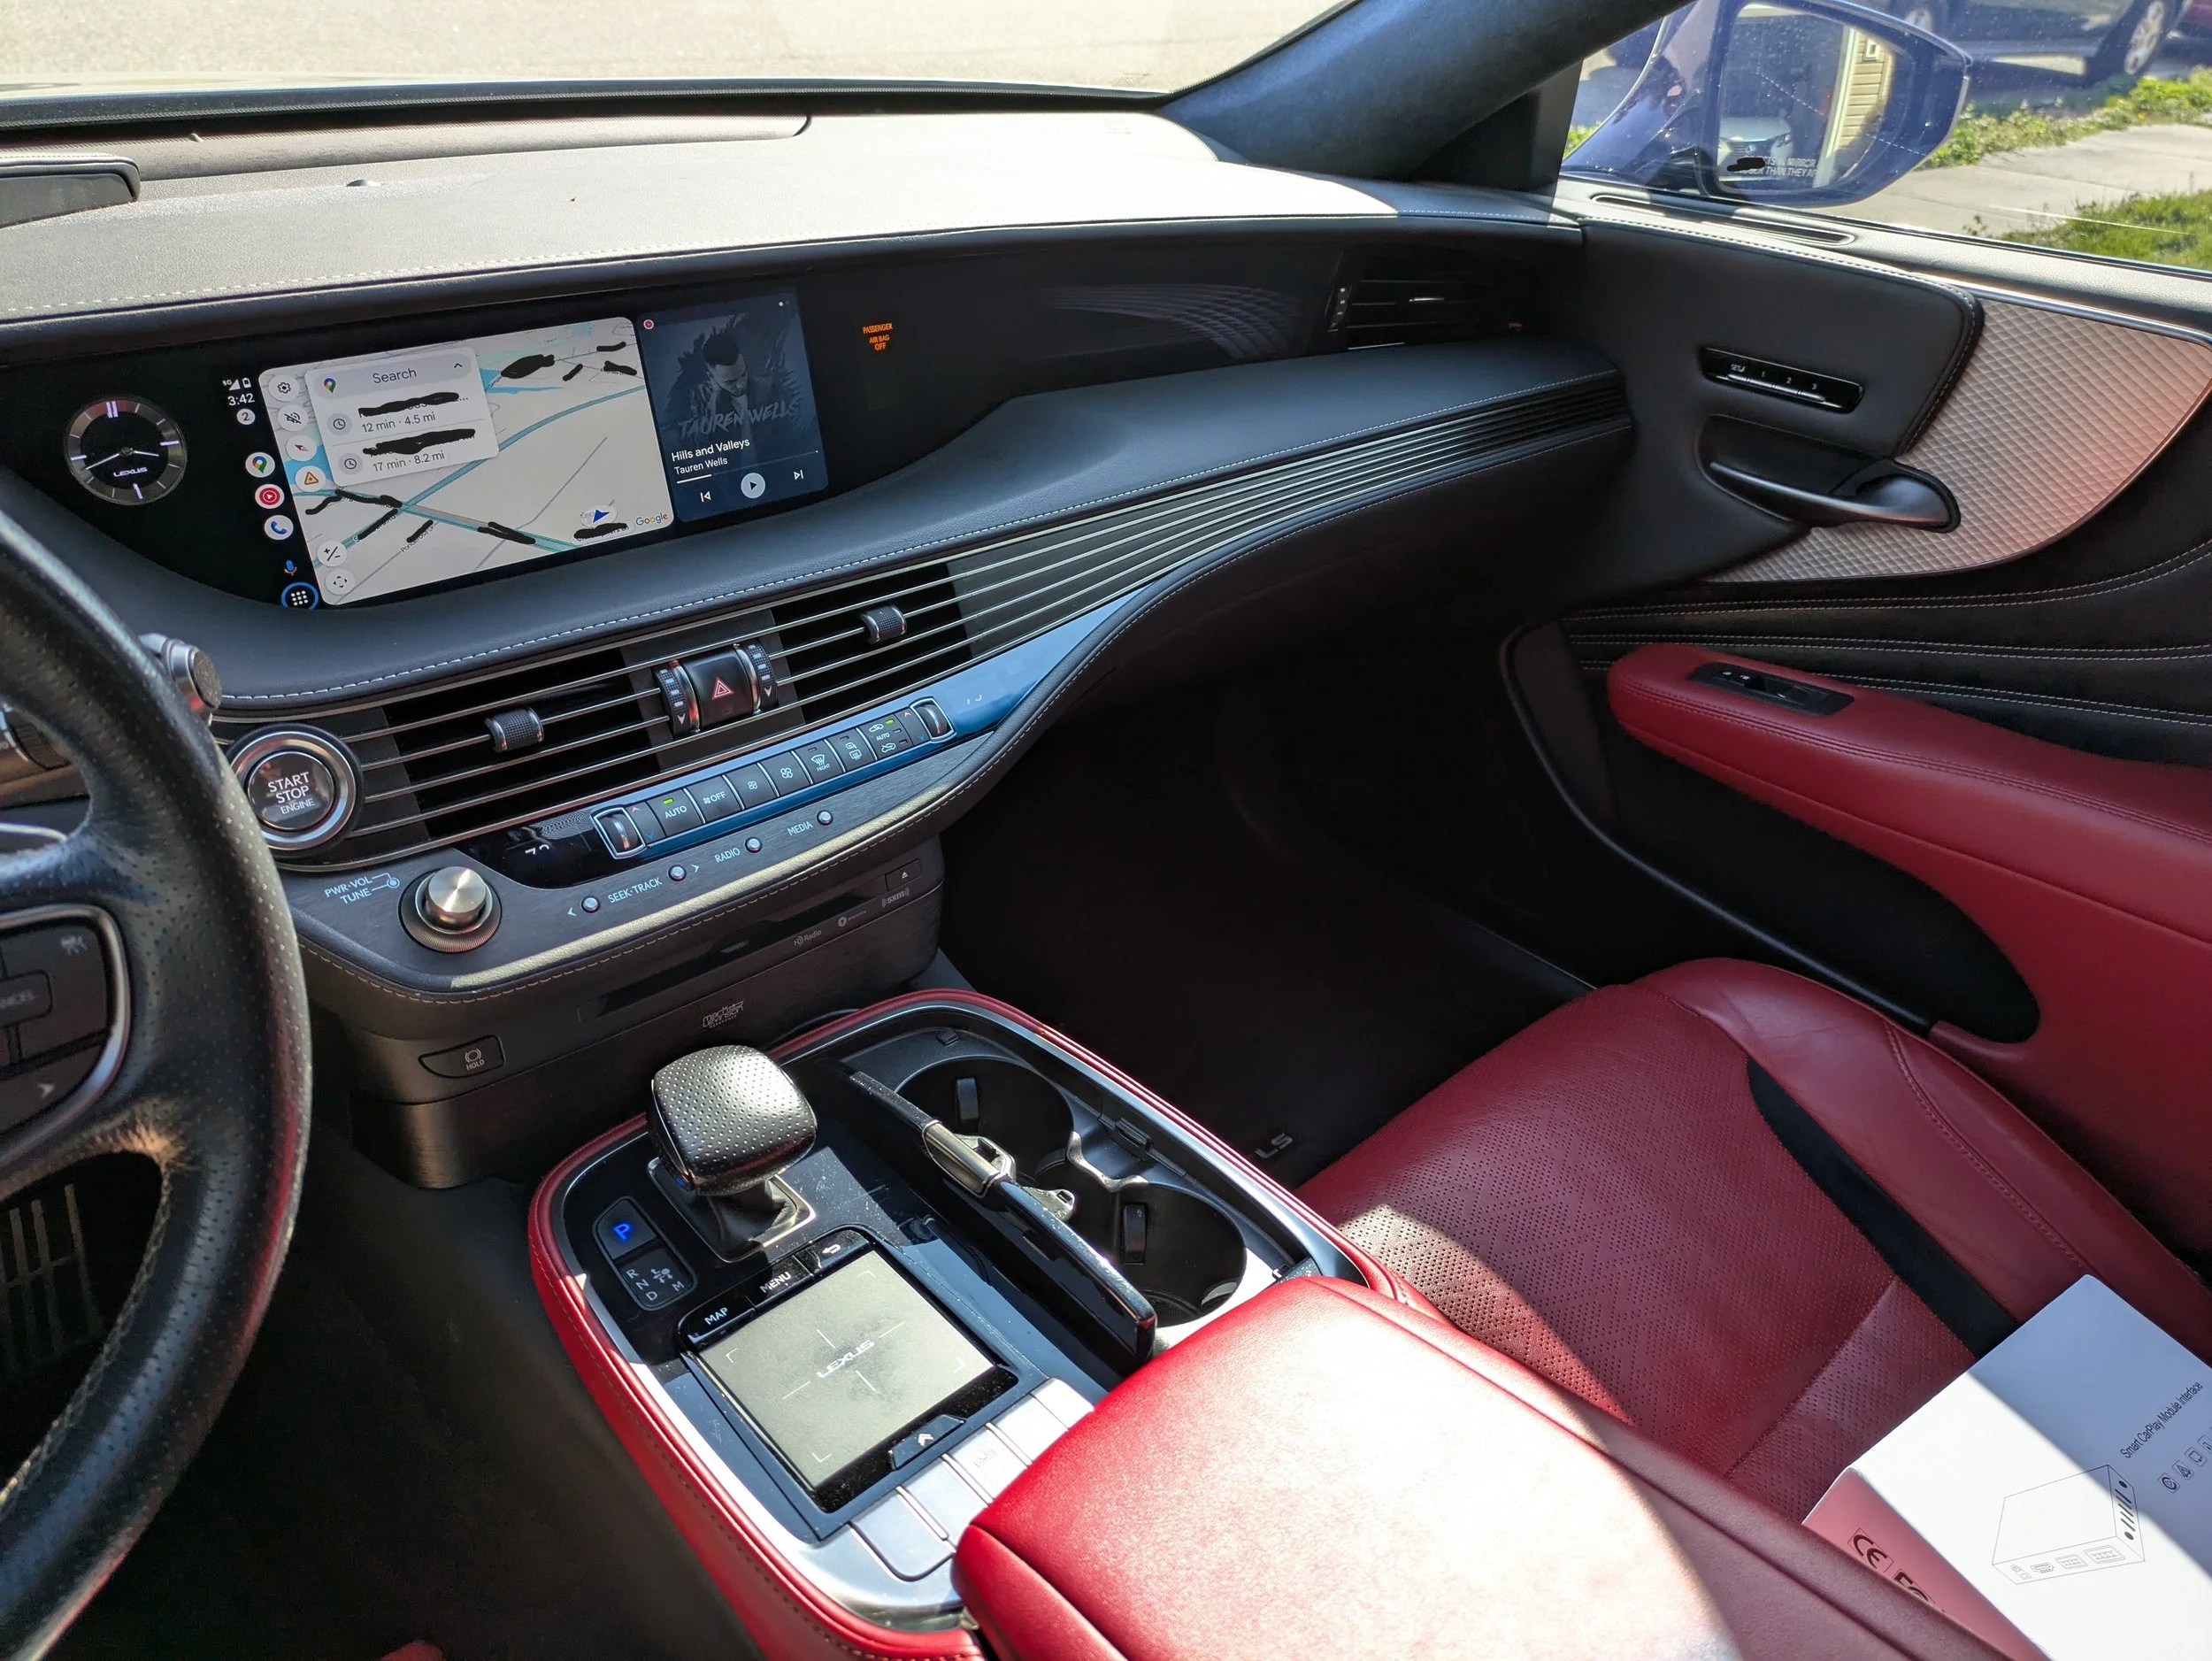
And by golly I put everything back together and it’s so PURRTTYY!
Oh and hey you can see the USB cable I was talking about HAHA it just sits there if my client wants to hardwire his phone or needs to update the system.
So where do I go from here?!
No where because I’m tired of this blog already lol
I had to drive this bad boy around for a little to re-calibrate all the cameras and other sensors and by the way, if you ever need to re-calibrate your reverse camera lines with your steering wheel…. Just put it in reverse, keep your foot on the brake and turn the wheel as far as you can left and then as far as you can right and the lines come back to life!!! Just an interesting tip I learned after having to do it on another project that required the battery to be pulled too!
Oh I should post a blog for the next time I have to install a security camera on a car which will hopefully be soon lol
Until next time!
Take Care!
-Amit